
One of the most common complaints I hear on a daily basis is from trail camera users who have spent their valuable resources on a trail camera, and are just not satisfied with the way it performs. The money they have invested in getting setup and the time it takes to run their camera is simply not paying off in the manner in which they had hoped.
For those in that position, take a deep breathe, your efforts are not for nothing. I have comprised a list of 21 tips that will help you reach your camera’s potential, regardless if you invested in high end equipment or purchased one from the bargain bin at the local sporting goods store. There is always room for improvement in getting the most out of your trail camera.
1. Choose the Right Trail Camera for You
Before purchasing a trail camera, it is important to know what you expect from it. There are a ton of options on the market today, and each camera has its own strengths and weaknesses. If your goal is to catch your neighbors dog digging in your backyard, its probably not recommended that you spend your hard earned paycheck on a camera that specializes in time lapse photography. Consequently if you are in search of the deer density on your property, using a camera with multiple settings for time lapse mode, around a food plot or watering hole, would be beneficial to you.
Its also important to know where you plan to hang your camera. Getting photographs of a black bear leaving its den in the spring can be some amazing photo opportunities, however using infrared or white flash settings can cause some unnecessary attention to your camera, that might provoke curiosity from an already irritable animal. And trust me from experience, bears can cause a lot of damage to expensive equipment (more on that later).
Whatever the case may be, think through your objectives, and the primary place you plan to use your camera. This small step will payoff dividends down the road.
2. Read the Manufacturer Instructions
I know you probably have already skipped over this section and have headed to #3, but for those still reading, hear me out. I spend hours and hours dealing with trail cameras. From field tests to design studies to research on the newest technologies soon to hit the market. I absolutely submerse myself in trail cameras, and you want to know how many times I read the instruction manuals: Never! And every time I regret it.
While most cameras operate in a similar fashion, each one has its own unique functions and recommendations. From specific batteries and SD cards to test modes and set up instructions, each camera has its own oddities that help it run at maximum potential. Who would know more about your specific camera that then those who design, engineer and manufacture it? Read the manual.
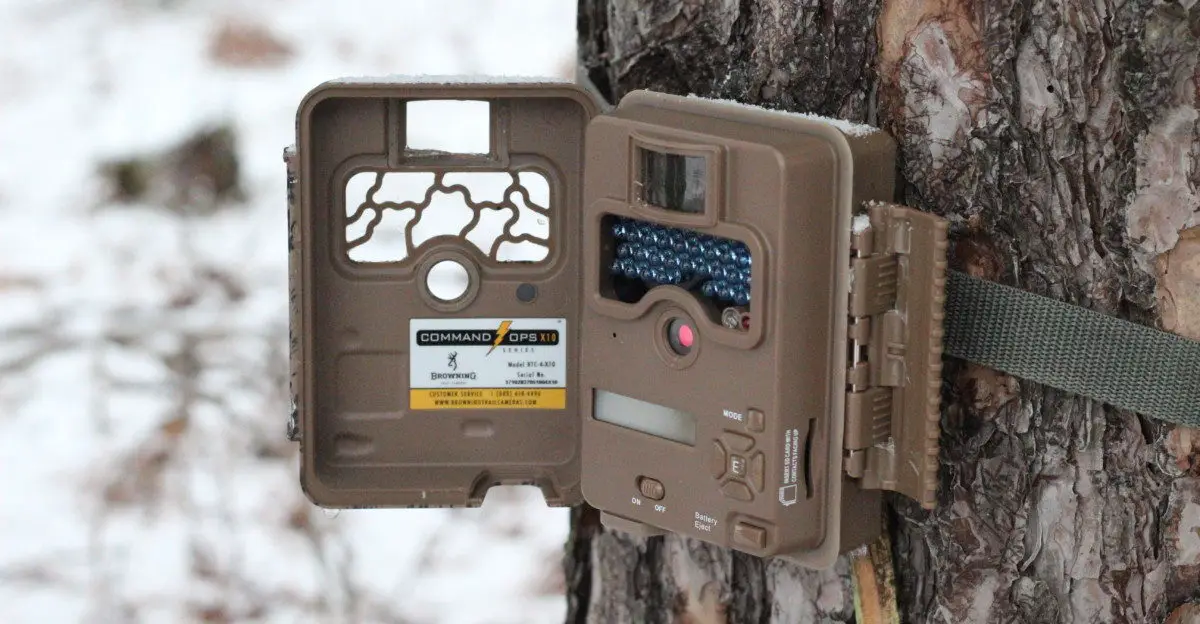
3. Adjust the PIR Sensor
Many cameras on today’s market are manufactured to have a setting to adjust the passive infrared sensor (PIR). The PIR is simply a sensor that measures the amount of infrared light that emits from objects within its viewing range. When a warm body such as a human or an animal walks within the detection zone, the change in infrared within the range triggers the sensor. Most cameras have this technology in connection with their motion detection systems, because PIR systems are actually broken up into two parts; The measuring of infrared, and the actual motion of the object.
As a camera owner its important to understand this concept, because every living thing emits infrared. Mammals, birds, trees and grass all emit different levels of infrared radiation, and the warmer something is, the more it will radiate.
Adjusting the sensitivity on the the sensor will give you a little control over the levels of IR radiation an object must emit before activating the motion detection. A lower sensitivity setting will help with false triggers of leaves falling out of trees and wind blowing through the grass.
4. Using the Best Batteries
Batteries are a key component to the optimal function of your camera, and the consumer has a wide variety of choices from Alkaline, lithium, and rechargeable. Many cameras on today’s market are even compatible with with external batteries and solar panels, as well as internal rechargeable packs.
The importance of choosing the right battery is essential to receive the most from your camera. 90% of cameras on today’s market operate on AA batteries. One AA alkaline battery will produce approximately 1.5v of power, while one AA lithium battery is around 1.7v of power. If the manufacturer of your camera recommends Lithium and you choose to use the less expensive Alkaline your camera will still work fine. The difference you will notice is with the overall performance of key functions such as detection range, flash range, trigger speed and battery life. Each of these components of your camera are working at its optimal levels with a slightly higher voltage.
5. Keep Fresh Batteries
While we know the importance of choosing the right battery for your trail camera, just as vital is keeping your batteries fresh. The amount of charge a set of batteries can hold will gradually decrease due to age, usage, and cell oxidization.
While different batteries such as lithium and alkaline have separate chemical makeups, they both typically hold a manufacturer warranty for the first 20% of the the batteries power. So if your batteries are holding 80% battery, they have already exceeded the warranty from the manufacturer.
An alkaline battery contains three sections. The first section is what is known as the rock content. This content is what has been used, and is actually dead material that can never be recharged. The second section of a battery is the available energy that the battery still contains, and the third section is the empty zone, that with the right battery can be recharged.
The importance of all of this to your battery life, is that when your camera is showing 60% battery, the percentage of the the battery that still contains available energy is closer to 30%. When a battery is producing energy at less than maximum capacity, it will not produce the needed voltage to run your camera at optimal levels. So the recommendation is to change your camera batteries when the power dips anywhere below 70%.
6. Use the Correct SD Card
SD cards can be as simple or as complicated as you would like to make them out to be. The basic advice is read the manufacturers recommendations for each specific camera. They vary dependent on the camera you use, and the speed in which your camera is taking pictures. Most cameras on today’s market will handle at least a 32GB card.
What most people overlook is the speed of the card. Each card has a rating circled on the front, typically somewhere between 4 and 10. That number is is the amount of sustainable gigabytes your device can transfer to the card per second. In general if your camera has a fast trigger speed, with a multi burst setting, the higher class of card the easier the images will be able to transfer to you SD card. For a deeper dive into SD cards check out our latest article on choosing the right SD cards for your trail camera.
7. Formatting Your SD Card
In order to maintain an SD card’s speed performance, preserve its storage capacities, and reduce risks of storage errors it is recommended to format each SD card to the specific trail camera you are using. Formatting is a very simple action that can save you hours of headaches. Each camera is different, but most cameras when powered on have an option of formatting your disk in the field. The term formatting is basically deleting all photos and files that are previously on the card, and creating a file compatible to the camera.
It is very simple to fall into the habit of deleting your photos once you download them onto you computer, but to get the best results it is better practice to format your card to each specific camera. It is important to note that you can interchange SD cards between camera models and brands without any problems as long as each time you insert a card into a camera, you format it to that camera.
8. Update the Firmware
Updating the firmware to your camera is probably the most overlooked aspect of getting the most from your camera. Just as your smart phone periodically needs to be upgraded so does your camera. Over time small glitches or under performing software in the camera becomes noticed by the manufacturer, and they put out a free firmware upgrade, so that you can get maximum performance from your investment.
To the consumer, often times it might seem labor intensive, but the steps are very straight forward and easy to follow. Check out here to see the basic guidelines to updating your camera’s firmware, and find links to manufacturers updated firmware lists.
9. Test the Trail Camera
There is nothing more frustrating then setting up your camera, letting it sit in the woods for three months then finding out that you missed a step and the entire time you didn’t take one picture. Set your camera up the way you want it to work in the field, and hang it on a tree in your front yard, or strap it to a chair in your kitchen. Let the camera work for a day and then check the pictures. Make sure that it is in complete working form, and all of the image stamp information is correct.
Once you are in the field, do the same thing. Walk by the camera a time or two to make sure the motion trigger is picking you up, and use a card reader to confirm everything is working correctly. This extra step will take little time or effort but could save you a ton of headaches in the end.
10. Positioning Your Trail Camera
There is an astonishing amount of things to consider when hanging a trail camera in the field. We cover this in depth in avoiding false triggers, but for now we will cover the 3 most common mistakes.
- Never point your camera directly East or West. As the sun rises and sets the light that is emitted can cause over exposure to the pictures your camera is taking. The movement of the direct light combined with the shadows from trees can also create false triggers
- Do not hang your cameras too high or too low. This one is tricky because it completely depends on what you are trying to photograph. Whitetail deer for instance stand roughly 3ft tall at their shoulders. So placing a camera at the 3-4′ height will make the camera very susceptible to being detected, especially during the night when a flash is deployed. Hanging the camera too high will give you bad angles, not only for the picture, but also the detection view and distance. So, whenever possible hanging the camera at about the 6-7′ height and angling it down slightly will give you the best of both worlds.
- If you have the ability to buy a camera with fast trigger speeds, long detection distances, and wide angle of view, I recommend doing so, but if those features do not fit into your budget, don’t worry, there is a slight trick to fixing that problem. Do not place the camera directly perpendicular to game trails. Often times a slow trigger speed coupled with a narrow angle of view, will result in only getting pictures of the back quarter of your target. Instead angle your camera down the game trail at a 30-45 degree angle. This allows you to use the entire detection distance you do have, and keeps your query within the angle of view for long period of time, as well as allows the slower trigger speed to catch up to the animal..
11. Know Your Trail Camera’s Ranges
This might seem pretty obvious, but it is important to know the detection and flash ranges your camera is capable of. It doesn’t make sense to place a camera 70 feet from a game trail when your camera’s effective detection distance is 50 feet.
Another aspect to consider is the affect that your flash range might have on your photo quality of night time pictures. Having a strong flash distance can be a great asset to your camera, but if your placement of the camera is too close to the target, it will essentially create too much light to an object that is too close, creating an over exposed picture, and giving the photograph a white out image.
12. Theft Protection
Trail camera theft has become a serious problem within the hunting community. Whether the problem is a false sense of ownership of a certain piece of land, or animal, or just an old fashioned case of sticky fingers, theft protection for a trail camera is essential in defending your investment. Let’s face it, it is impossible to get the most from your trail camera if you no longer have it. Here are three simple actions you can take, to keep you trail camera out of the hands of others:
- Hang your camera up a little higher. It is easy to spot a camera that is eye level. Hanging a camera higher in the tree will eliminate a random passerby from seeing it.
- Use No-Glow flash cameras. IR and white flash cameras give off flash. Even if it is a light glow, in the dark woods it attracts attention. Concealment of a camera is your best asset when dealing with a thief.
- Use lock boxes and cable locks. While locking up your camera is not a perfect solution, it is a deterrent for someone to steal it the first time they see it. Most people will not be walking around the woods with bolt cutters looking for trail cameras to steal. Most often theft of trail cameras is due to presented opportunity. If your camera is locked, the thief would likely have to make a second trip to you camera with tools. Check out the locks I recommend.
13. Animal Protection
Animals become curious about trail cameras, there is no disputing that fact. I have had a young whitetail buck rub its antlers on a camera, as well as a 250 lb black bear toss one around like a chew toy. While using bear proof boxes do help, the fact is the housing of most cameras are plastic molding, and a little weight from an adult bear can easily break the camera free from a tree. The best bet from deterring an animals curiosity is concealment. Using silent cameras with no-glow technology, and eliminating as much scent from the camera as possible are your best bets.
14. Use After Market Accessories
Too often you come to a situation where there is not a perfect tree to place your camera. Whether you are in a cattail swamp, an open field or an alder thicket, your options for that perfect camera setup is just not present.
There are a number of great accessories on the market today that allow you to still set your camera in that ideal spot. The micro-pro game camera mount from Hawk, as an example, is an option for screwing into small trees or fence posts. Their simple screw in system is quick and easy, and the mount fits any camera.
When there is nothing available to screw into, I like to use the original Stick-n-pick. This device simply attaches to your camera by screwing into the bottom using the ¼ 20 threads. Then you simply just stick the device into the ground where ever you need it. It is simple to use and relatively inexpensive. Check out these recommended accessories and more at our recommended products page.
15. Keep up with Maintenance
Trail cameras, like any other piece of equipment needs regular maintenance to keep in pristine working condition. One thing that is vital to taking great photographs with your trail camera is keeping the lens clean. A simple micro fiber cloth can be used to wipe away any dust that accumulates on the outer lens.
Moisture control can also become a vital aspect of keeping the trail camera in proper working order. Nothing causes more damage to electronic devices than a build up of moisture. Using a small bag of desiccant packages inside the housing can eliminate any moisture.
Check out our complete trail camera maintenance check list for more information on ways to keep your camera working efficiently.
16. Try New Settings
The majority of trail camera owners use one mode; still photos. While there is a ton of information that can be learned from simple photo modes, most cameras are not being used to their full potential. Here are the three other main trail camera settings that you should use:
- Video- While cameras come with a wide variety of resolutions, a 30 second video will give you a better understanding of what is happening in the woods than a simple picture, and in a way it is more fun. Just be aware that this mode will use more battery than still pictures, and fill up your SD card at a faster rate.
- Timelapse- to use a timelapse mode you need a special set of circumstances, such as a food plot watering hole, or a large crop field. In these large vast areas, it is sometimes difficult to get a deer to step into your detection zone in order to trigger your camera. This mode allows you to take photos at incremental times during peak movement, such as dawn and dusk. Many of the new cameras on today’s market allow this setting to work in conjunction with motion activation, so you are never missing an opportunity for a great photo. The only draw back to this mode is the increase of blank pictures that will fill up your SD card.
- Hybrid- The hybrid mode is the best of both worlds. Not every camera is equipped with this feature, but for those that are, it is a great feature to have. In hybrid mode the camera is activated by motion detection and takes a photograph first, then proceeds to take a video after. This works well during the whitetail rut, when bucks are following does. The doe will trigger the camera, then you will have approximately 15-30 seconds of video of the buck trailing behind. This mode too will use up battery at a faster clip, as well as use the space on your SD card at a faster clip.
17. Use Carrying Cases
Trail cameras are an investment in your time, your energy, and often your hunting success. But we are all guilty of taking that investment and shoving them into a back pack allowing them to bang and jostle around as we hike through the woods. Although we very seldom acknowledge it, trail cameras are an expensive technological tool, that can very easily become damaged not only on the exterior but also within the casing. Take the time to protect your investment and research a carrying case for your camera. Here are some trail camera bags I have used and feel confident to recommend.
18. Eliminate Scents
If you are a hunter this comes as no surprise, but for everyone else, animals have an incredible sense of smell. It is often their first line of defense against predators, and the scent that you leave on your camera might have lasting affects on the amount of pictures you are able to take. Using scent eliminating wipes such as dead down wind’s field wipes work well for keeping your human odor off from your camera.
Taking fewer trips to check your camera will have lasting affects as well. Most animals will only tolerate a small amount of human traffic before they leave the area completely. When you do take the time to check your cameras go in during mid day when most nocturnal animals are bedded down, and try to time that with a rain storm. The rain will knock down the scent from your boots and clothing, and you are likely to get away with more during those times.
19. Use Supplemental Attractants
Are you tired of getting a photo of an animal running by your camera? Slow them down with a supplemental attractant. Setting your camera over a salt lick or mineral site can be dynamite for great pictures, especially in the winter and early spring when food sources are more scarce. Change your settings on your camera to take only a picture or two, rather than rapid fire, otherwise your SD card might fill up within a few days of the same animal visiting the site for hours on end. Be sure you check your local and state regulations before placing any supplemental feed, to ensure this practice is legal in your area.
20. Keep Photos Organized
Now you have thousands, if not hundreds of thousand of some of the best photos and videos you have ever gotten. Now what? How do you keep them organized? Well there are plenty of options. You could use paid for services such as Deer Lab, Hunt Force or Wise Trail camera software. These services are exceptional at organizing and categorizing your photos. They allow you to track individual animals, and give you in depth analysis such as weather conditions, moon phases, and times of day. All of which would take you weeks to organize on your own.
If you would rather Do it yourself, we are in the same boat. Going through each picture analyzing, categorizing, and filing is half the fun. We have laid out a step by step process that makes organizing your photos simple to do, and easy to find. It will allow you to keep track of annual patterns, broken up by location and gives you the opportunity to investigate what weather patterns move animals by your camera. Its all in our article How To Organize Your Trail Camera Photos.
21. Be Patient
If you have followed the first 20 tips, the only thing left to do is be patient. Your camera is in good working condition, you have tested it, made it as theft proof as possible, eliminated as much scent from your camera site as you could, now let your camera do what it was created to do, take pictures.
The biggest mistake most trail camera users make is checking their cameras too frequently. If the pictures are there today, they will be there in two weeks. Unless you are passing by a camera on the way to a tree stand, driving by one on a tractor, or filling your bird feeders near your camera in the back yard, don’t make any unnecessary trips into your camera site. Checking your camera once every 3-4 weeks is the most frequent activity I recommend.