
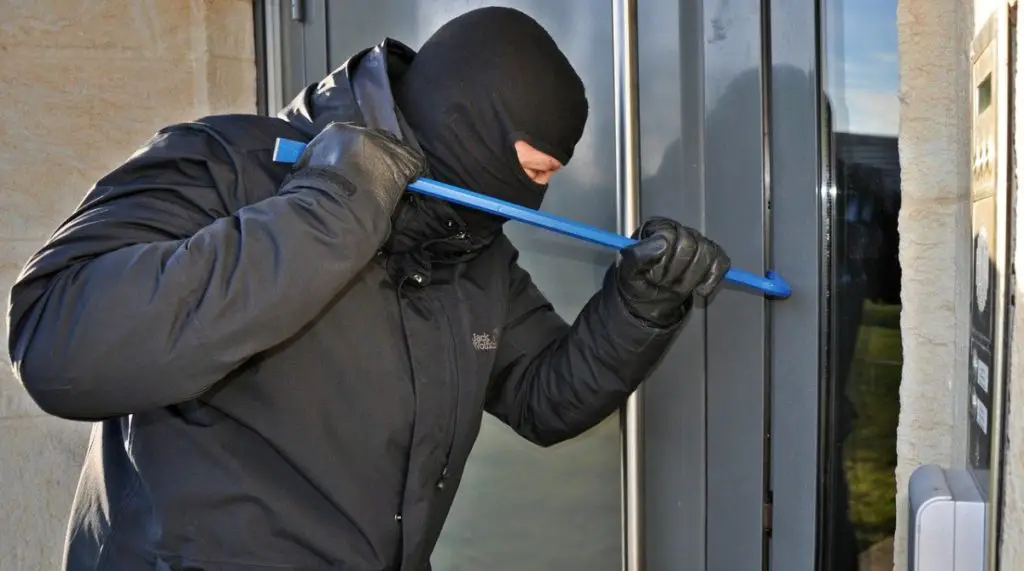
According the Depart of Justice, over the next 20 years, statistically 3 out of every 4 houses will be burglarized in America. To make matters worse, only 13% of these burglaries will ever be solved due to lack of evidence. Protecting your family and your home is your number one priority, and we will cover everything you need to know about using trail cameras to set up a surveillance system that will not only deter burglaries, but will capture visual evidence in the unfortunate case a burglary does occur.
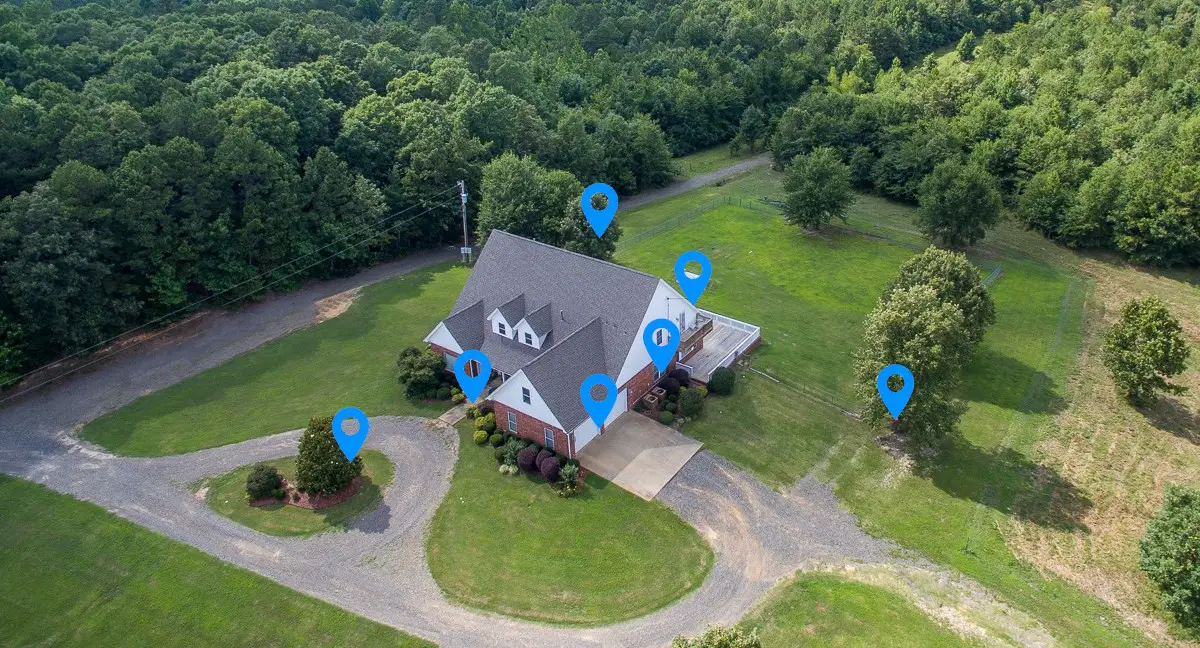
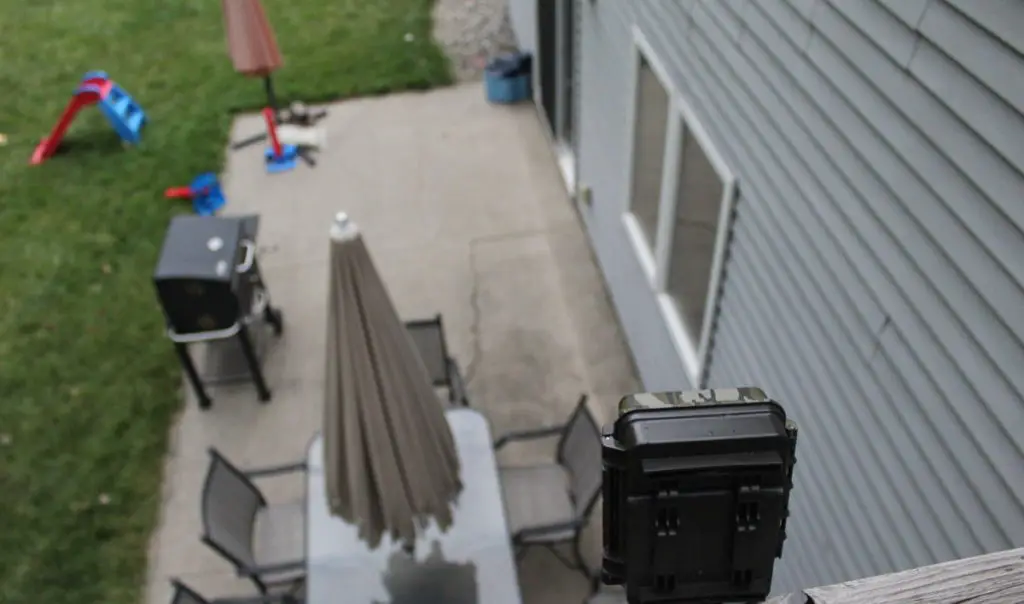
The best places to hang trail cameras for security is in areas where they can monitor the most vulnerable locations of your house, such as the front door, first floor windows and the back door. Although most people opt to hide their cameras, the visual appearance of a camera, has been known to deter burglars.
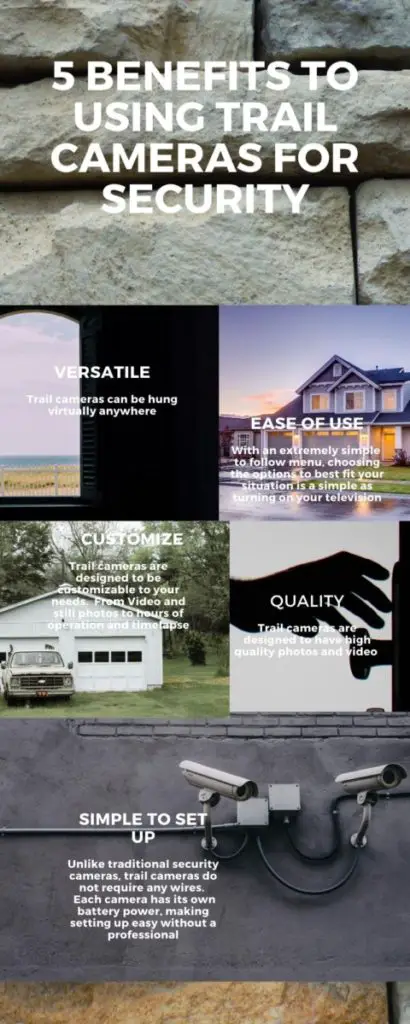
Why Use Trail Cameras For Security
With so many options on the market for security cameras, you might wonder why trail cameras are such a good alternative. The truth is, as the advancement of technology continues to move forward at the speed of light there are great options for tradition security cameras, but trail cameras will give you more versatility, ease of use, and higher quality for your home’s security.
Trail Camera’s Versatility
With an internet search, you can find plenty of options for home security cameras, all at a seemingly cheap price. Most of these cameras however are designed for very specific purposes, and have limited coverage of a specific area.
Trail cameras on the other hand have the ability to be used in multiple ways from video mode, to still photos, or even time lapse photos. And trail cameras are completely customizable.
With a trail camera, you can choose how many photos you want to take, the length of video you wish to record, a time period during the day you want the camera to work, and even the quality of photo you wish to receive. And unlike most home security systems, there are no wires to run, as each trail camera functions individually on its own battery power.
You can place trail cameras virtually anywhere from the eve of your house to a tree that lines your driveway, making trail cameras the most versatile option in protecting your home.
Ease of Use
Trail cameras are remarkably easy to use as well. The interface on trail cameras, are designed to make switching settings as clear and simple as changing the channel on your television.
The menu options are laid out in an easy to understand format, making it simple to find what you need, and even easier to change them.
While many home security systems might require a professional to install wires, mount cameras, and fine tune the angles of the cameras, anyone could reasonably install an entire home security system using trail cameras in less than an hour, without the help of a professional technician.
Quality of Trail Cameras
The final thing I want to mention is the quality that trail cameras bring to the table. We have all seen on the news security footage from a traditional security camera. The picture is always too far away, and in the moment of truth the still frame of a suspects face appears blurry and out of focus.
Trail cameras, are naturally designed to be used to document wildlife. In doing so, the quality of the photos and video are designed to be of the upmost quality and detail. I am not saying that you will never have a trail camera photo that comes out less than ideal quality, but trail cameras are designed in a way to minimize motion blur and to allow you to zoom into a photo for better detail.
Those two feature alone set trail cameras head and shoulders above traditional security cameras.
Where To Place Trail Cameras For Security
Where Most break-ins Occur
Before we can discuss the best placements for trail cameras around the house, we must understand where most burglars gain entrance to homes. Even the best placed trail camera will not do you any good unless you are surveying the most popular entry points.
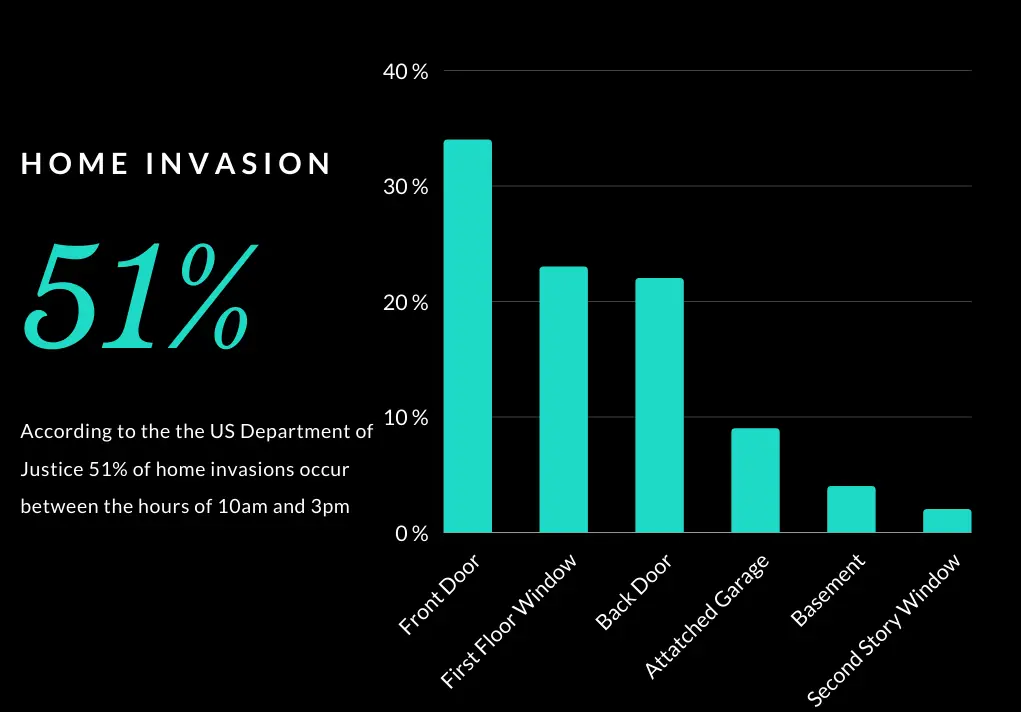
According to United States Department of Justice here is a break down of where most burglars enter the home:
- 34% enter through the front door. Sometimes this includes just turning the handle and walking in, but most of these occur as a forced entry.
- 23% enter through a window on the first floor.
- 22% of all entries are through the back door. This is especially concerning as it is out of the eyesight neighbors as well as street traffic
- 9% gain access to homes through an attached garage.
- 6% enter through unlocked areas such as sheds, vehicles, and outdoor storage
- 4% will enter through a basement
- 2% will climb a tree, a deck, or stand on a table to access a second story window.
Placing Trail Cameras For Security

When placing trail cameras around the house for security, one of the most important factors to remember is that we want to locate trail cameras in areas that specifically monitor entry locations. The cameras should always face directly at the vulnerable entry points.
For example, a trail camera is more effective in catching a burglar if it is facing directly at the door, rather than surveying the sidewalk leading up to the door. The reason for this is two fold:
- A burglar is going to spend more time gaining access to the house, then they will walking up to it. This will give us better opportunities to have a positive identification.
- Having actual footage of the suspect breaking into the house eliminates the possibility of plausible deniability. Meaning just because you have a photo of someone walking up to the door, it could be argued that there is no evidence they were the one to actually break into the house.
With that bit of information understood, lets take a look at the most vulnerable entry locations to a house, and how to place trail cameras to most effectively have surveillance of your home.
Front Door
As we have mentioned, the front door is the most common point of entry in break-ins, and should be monitored. The placement of trail cameras in these locations can be a bit tricky. You essentially have two options:
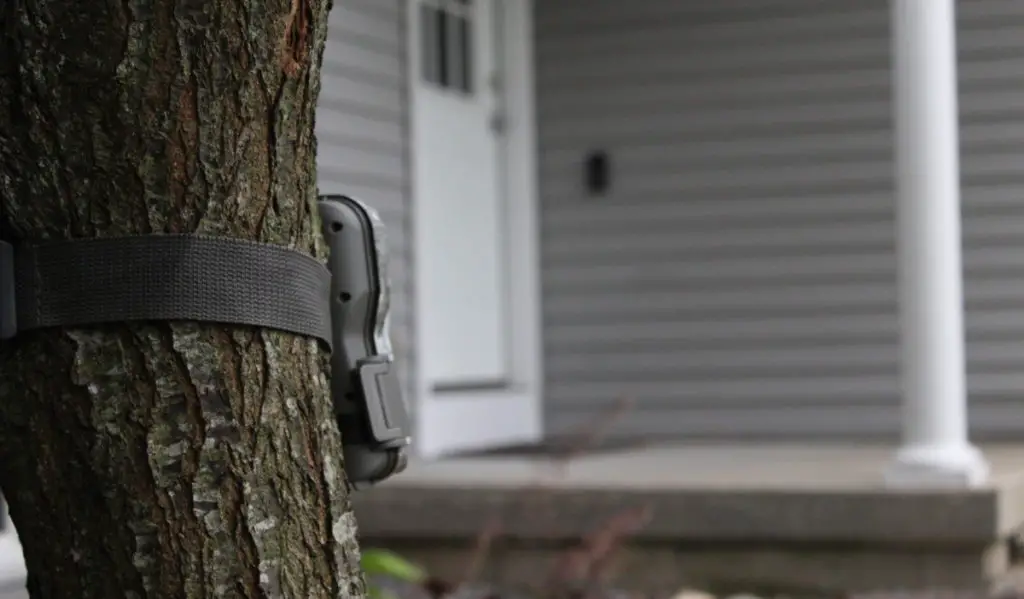
- Hang the trail camera high, from an eve or a tree that is close to the front door. This will give you the best chance of capturing a photo of the suspects face.
- You can hang the trail camera in a bush, or a nearby tree that directly faces the door. While this might not present as many opportunities for facial photos, it is very rarely that someone would come to the door, without turning around to make sure they are not being watched.
First Floor Windows
You do not need to have a trail camera over every window of your house. In fact, it is much easier to use one trail camera to survey an entire side of the house.
Hanging a camera high on an eve, and pointing it across the length of the house, not only will give you a great vantage point, but will allow you to be able to monitor every entry point on that side of the house.
Back Door
Survailance of the back door is going to be very similar to the front door. With 22% of all burglaries entering through the back door, you are going to want to make sure that you have this entry point covered.
You can use a single camera to monitor the entire back side of the house, similar to the way you would for monitoring first floor windows. Or as we recommend, having a designated camera specifically for the back door. Either way, be sure that the placement of the camera monitoring the back door leaves opportunity for the camera to have an angle that will allow you to get a photo of any suspects face.
Garage
Monitoring an attatched garage is one of the more tricky locations to hang trail cameras. The reason for this, is that there is no set way for a burglar to enter a garage. Some garages are entered through side doors, others through the large roll up door, and some enter by breaking into cars in the driveway and using the remote access to the door.
It is virtually impossible to monitor all possible access points outside the garage, therefore, I recommend hanging the camera inside the garage.
When you place a trail camera inside the garage, you will have the ability to monitor any activity inside, regardless of which way they access the garage.
Hanging the camera high on the back wall of the garage is the best vantage point to monitor any activity inside the garage.
Sheds and other Detached Buildings
Hanging trail cameras around detached buildings is actually very simple. Regardless if you are monitoring a shed, pole barn, or even a green house, in most cases, there are ample opportunities to hang cameras on nearby trees, or along the eves of the building.
If neither is available, hanging the camera inside the building, similar to the way we discussed monitoring garages, is a great option.
Monitoring Driveways
Not all driveways need to be monitored. In fact the amount of traffic that a driveway gets, from postal workers and neighborhood kids, to your own entry and exits, it can be more of a bother than it is worth.
However, if you have a long driveway that is set back from the road, or you leave your cars in the driveway, rather than inside a garage, the driveway should be protected.
The problem with driveways is that there is no one size fits all solution. Each driveway is different, and what you want to monitor in the driveway can change from house to house.
You can monitor parked cars, by hanging cameras in nearby trees or by placing a trail camera in the peak of the garage looking down the driveway. If you are interested in who is pulling their cars into your driveway, Reconynx, while very expensive, make a camera that 100% designated for capturing the license plate of vehicles.
The point is to know what is most vulnerable in terms of your driveway, and use a camera in a location that is not only able to monitor these areas, but is close enough to capture quality photos.
Monitoring access from the back of the house
In general, burglars do not want to be seen at all. While there is a larger percentage of suspects that walk right up to the front door, another point of access to the property is through the backyard, especially to homes that are surrounded by wood lots.
This gives potential burglars a potential cover, during day time, the most common time for a home to be broken into. It also provides an easy escape if things were to go wrong.
Having some sort of surveillance along the back end of your property will help in determining not only who the invader is, but the direction they had come from, and the direction they retreated to.
What Settings to Use
Now that we have established where to place cameras, to give you the best security coverage of your home, lets dive a bit deeper into the settings that you should use when setting up your trail camera.
Video/ Photo
As a general rule of thumb whenever possible I use video mode for security. The simple reason is that video mode will cover the area for a longer period of time, giving you more opportunities to catch important information about the suspect.
With that said, not all trail cameras have the same video quality. Here are a few things that a camera’s video recording must have in order to make using video mode worth it.
- 1080p video resolution
- Film @ 30 frames per second or greater
- Large capacity SD cards
- less than a one second recovery time
The need for these specifications are simple, if the trail camera takes grainy video that is choppy in movement, you are better off using photos to survey an area. Grainy video will only cause more frustration in trying to identify suspects.
Megapixels
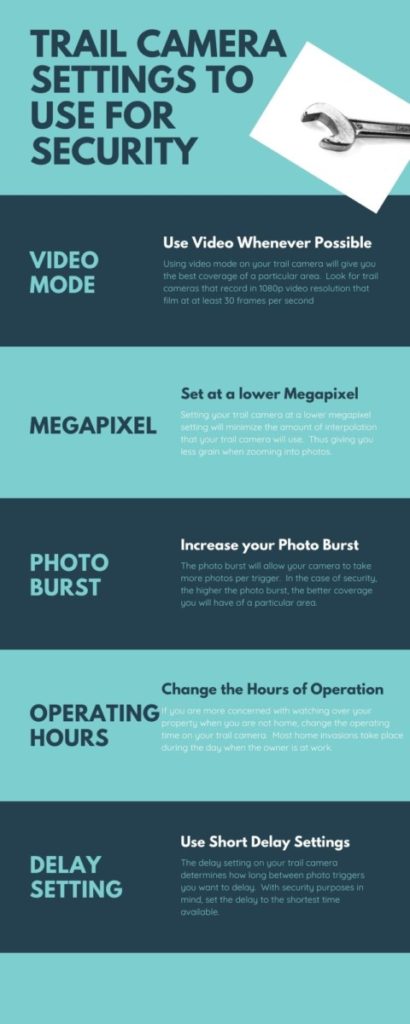
If you do choose to use photo mode one of the most important aspects to think about is the megapixel settings on the trail camera. It is a big misconception that high megapixel rates equates to better quality photos.
The truth is that the better quality of photo depends on the size of the native image sensor. For trail cameras, most image sensors are between 2 MP and 5 MP. In order for a trail camera to reach their advertised photo megapixels the camera performs interpolation, or essentially duplication of megapixels.
When using trail cameras for security one of the biggest things you need to consider is the need to be able to zoom in on specific parts of a photo, making it necessary that you set the megapixel setting to as close to the native image resolution as you can. This will minimize the amount of duplicate pixels in the photo, giving you a much more clear image when you zoom in.
While a photo at full scale might have an appearance of higher quality, the moment you begin to zoom into the picture, you will instantly see that lines become blurry, and the resolution is not clear.
Delay Settings
The delay setting on at trail camera controls the amount of time that the camera “rests” between photo triggers. This setting is essentially used the most for outdoorsmen who are setting their camera over an area where animals linger. Not wanting to fill up an SD card full of the same animal, they set the delay to a long period, allowing the animal to move on before the camera is ready to take another photo.
In the case of security, the last thing you want is to allow the camera to “rest” during a burglary. What you want is the most amount of photos as possible. Setting your trail camera to the shortest delay setting available is your best option.
Some cameras allow you to set the delay to instant, while others have at least a 5 second delay. Either way, be sure to set the delay to as short as possible.
Photo Burst
Most trail cameras give you the option of photo bursts. This allows you to predetermine how many photos you want the trail camera to take every time the camera is triggered.
For security purposes, this is a no brainier, you want the most amount of photos as possible. Setting the photo burst to a high photo count, and coupling that with a short delay setting, will give you more photos, resulting in betting information you can gather.
Operating Hours
Despite what is portrayed in movies, the majority of home burglaries take place during the day, between 11 AM and 2 PM. This is the time in which most people area away at work and children are at school.
In some areas, such as your garage, you might choose to want to only have your cameras work during those times you are typically away from the house. In the menu settings on your trail camera you can set the operating times in which you want your camera to be active. In general this will eliminate a lot of photos of you, while still keeping your cameras active during those times of the day that are most vulnerable.
With this as an option, I would still recommend that you allow your cameras that monitor your front and back door to stay active around the clock. In many cases, burglars will come to the door and knock to make sure no one is home, before entering. Even if you are home, having a photo of suspicious visitors could pay dividends later on.
Other Options to Consider
Hiding Cameras
While its a natural reaction to want to keep your trail cameras out of sight, for fear that they will get stolen, and keep a stealthy approach to monitoring your home, there is a study that show otherwise.
Roughly 73% of former burglars said they would avoid homes who had security cameras. That makes trail cameras not only a great tool for catching home invaders, it is also a great way to deter them from ever trying.
So, naturally hiding all of your trail cameras out of the line of sight is not the most effective way to protect your home. If you are still uneasy about leaving cameras in areas that are easily seen, and are more susceptible to being stolen, here are a few options you can use in order to create the visibility of having security cameras, without the inherent risks:
- Use Dummy Cameras- Dummy trail cameras are simply the outer shell of trail cameras. These cameras are very cheap, and if stolen, will not hurt your wallet nearly as much as a functional camera. Hang these cameras in high visible areas, while still using them in conjunction with working cameras.
- Use cameras with a white flash- White flash trail cameras, are cameras that are designed to take full color nighttime photos. The caveat to this is that they use a bright white flash. Imagine breaking into a garage and being met with camera flash that is comparable to a white strobe light. This will make any burglar take notice and quickly turn away.
- Hang Cameras in the windows of high risk locations- It is important to note, that trail cameras do not work through glass. We have a great article about why they do not work through glass, but for the purpose of deterring home invasions, nothing is going to stop a burglar quicker than staring face to face with a camera on a first floor window.
WiFi / Wireless
If you are hanging trail cameras that are not easy to access, like from the eve of your home, you might want to consider using a WiFi or Bluetooth capable camera.
These cameras do not require any addition cellular service the way a cellular trail camera does, but do allow you to access photos, manage settings and delete unwanted photos from your mobile device when in range.
This is a much more convenient way of checking your cameras without taking out the ladder and accessing each camera individually.
If you do want to be able to access your cameras from anywhere, at any time, the use of cellular trail cameras is always an option as well. While these are not a necessity, if you are using trail cameras for security at a vacation home, or rental property, they are extremely convenient.
The cost of cellular trail cameras will be more expensive, and then you have the additional cost of paying for cellular service to your camera, but in certain situations, these additional costs are worth the piece of mind while you are away from your property.
How To Hang Your Camera
The final thing that you might need to consider is how you plan to hang your trail camera. All trail cameras come with a strapping system that is best used in hanging your camera around the base of a tree. In many instances you are going to need an additional option to hang your from a deck, an eve, or even higher up in a tree.
The most universal mount for hanging your trail camera the gutters of your home is the Water Proof Gutter Mount by Wasserstein. This mount fits snugly on the outside lip of your gutters and is equipped with a 1/4-20 screw that easily attaches to the back of the trail camera. With a pivoting head, you have the versatility to adjust the your camera to any angle that is needed.
If you are in need of a mount that easily clamps on to a deck or fence, I recommend the Camera Clamp Mount by Camvate. This mount in its original intent is made for DSLR cameras, but is equipped with the same 1/4-20 thread that you will find on the back or bottom of your camera. It is solid in structure and is easily moved to set your camera in the position you need it.
The final mount that I recommend is the Speed Mount by Hawk. This camera mount is used to screw into objects like trees, and fence posts. The screw in threads are extremely aggressive, making it simple to bite into a tree. It is by far the simplest screw in mounting system on the market.
Great Trail Camera Options for Security
We have explored where to hang trail cameras, what settings to use, and ways to use trail cameras to deter threats to your home, now the question remains which trail camera should you use?
With a simple Google search you can find hundreds if not thousands of different trail cameras available on the market, the choices may seem overwhelming.
So, we broke down our favorite trail camera options for security to give you a good place to start your search.
Cameras To Use With Video
As we had already suggested, when using trail cameras for video purposes we always use cameras that have 1080p video resolution that are filmed at a rate of at least 30 frames per second. This gives you a better clarity of video footage, which is essential if you ever come to need it.
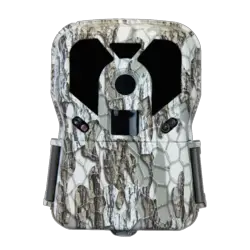
Browning Dark Ops Pro DCL
The Dark Ops Pro DCL by Browning Trail cameras is one of our favorite trail cameras to use in any situation. It records video in 1080p @ 60fps, making this one of the most clear and smooth video recordings on the market.
This camera not only has a very simple setup menu, it is loaded with features that make getting good quality performance very simple. The two features that we like the most from this camera is the Smart IR video recording and the dual lens technology.
Smart IR Video
When using most trail cameras in video mode, you need to set how long you want the video to record. This can be frustrating when the video time runs out, and there is more you need to see.
With the Smart IR video option that is available with the Dark Ops Pro, this trail camera uses the same passive infrared sensor (PIR) that activates the camera to determine how long the video should last.
Without going too deep into the inner workings of the trail camera’s PIR system, just know that as long as there is someone in front of the camera’s lens, it will continue to record.
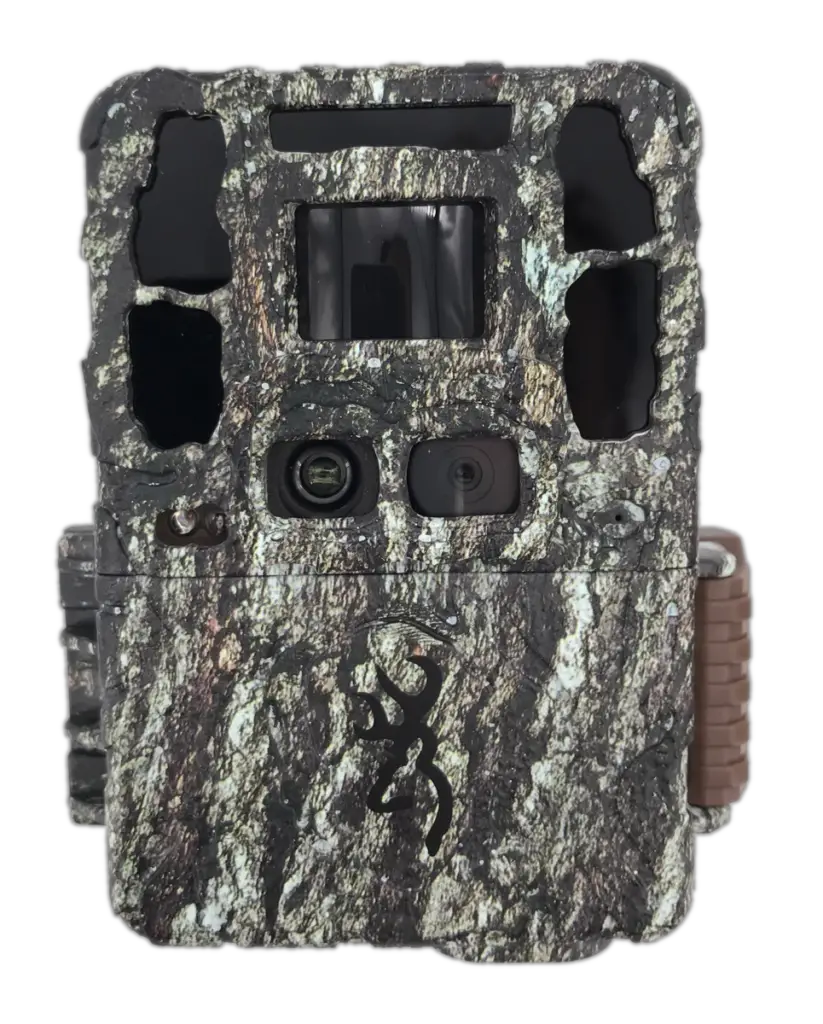
Dual Lens Technology
Again, there is a lot of technology behind the use of a dual lens trail camera, if you are interested in learning more about it you can read about the Advantage of Dual Lens Trail Cameras.
But for now, it is important to just understand that the camera is equipped with a designated camera lens for day time, and one for nighttime. Each lens is equipped with the right aperture for its designated time of day. This provides a better quality picture for both day time and nighttime.
The MSRP on the Dark Ops Pro DCL is $179.99. You can however find this camera at a slightly cheaper price on Amazon.
Exodus Lift II
The Lift II by Exodus Outdoor Gear is a trail camera that is made to record video. With a 1080p video resolution filmed at 30 fps, the specs on this camera do not do it justice.
While the frames per second are not as prominent as the Browning Patriot, the quality of this trail camera definitely rivals it. And what we like the most about this camera, aside from its high quality video is the manufacturer warranty.
Lift II Warranty
It is an industry standard to have a 1 year manufacturer warranty on trail cameras. That is what you will get with most of the major brands, but Exodus hold a 5 year warranty on all of its trail cameras.
Aside from the 5 year manufacturer warranty, it holds a 5 year theft and accidental damage warranty, which is absolutely an industry leading protection on your devices.
For 5 years, Exodus will warranty the theft of any of their cameras, by giving customer a 50% no questions asked discount on the purchase of a new camera.
For those who are using trail cameras for security, theft is obviously a concern, and Exodus continuously backs its customers by providing a warranty like no other in the industry.
The MSRP on the Lift II is $229. While they do often sell their cameras on Amazon, they are specifically a direct to consumer manufacturer, and you are able to get a $15 discount if you sign up for their newsletter directly from the Exodus Outdoor Gear website.
Cameras To Use For Photos
Covert NWF18
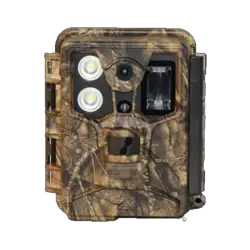
If you are looking for a good quality camera that utilizes white flash, the Covert NWF18 is a very solid choice. Covert cameras have always been a staple in my trail camera arsenal.
With quality color photos during both daytime and nighttime, a quick trigger speed, and a two year manufacturer warranty, you cant go wrong with any Covert trail camera.
Browning Strike Force Extreme
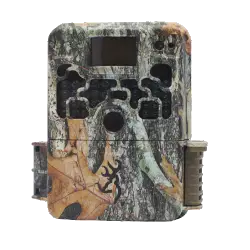
The Browning Strike Force Extreme is a really good all around trail camera. It takes quality photos, has a great detection circuit, and is completely customizable, in order for you to set the camera up the way you want it. It is nothing less than you would expect from a Browning trail camera.
We have written an in-depth review of the Browning Strike Force Extreme, that you can check out to get a better understanding of this trail camera.
Wireless Trail Cameras
Spartan Go Cam
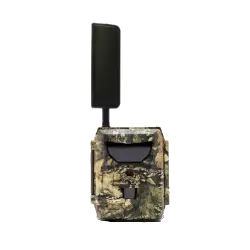
When it comes to wireless trail cameras there is no manufacturer on the market that does it better than Spartan. With fast transmission times to your phone, and quality photos, Spartan specializes in wireless trail camera options.
The Spartan Go Cam has an 80ft detection range, and a 52 degree field of view, making sure that nothing gets by your trail camera.
Moultrie Cellular Field Modem
The Moultrie Cellular Field Modem gives you a different take on using cellular service to protect your home. The field modem can connect to any Moultrie trail camera that was built after 2015, converting an existing stand alone camera into a wireless option.
This gives you the ability to try out a cellular trail camera option, without paying the much larger price that comes along with purchasing a cellular specific trail camera. With an MSRP of $59, you have the versatility of making any Moultrie camera into a camera that will send photos directly to your mobile device.