
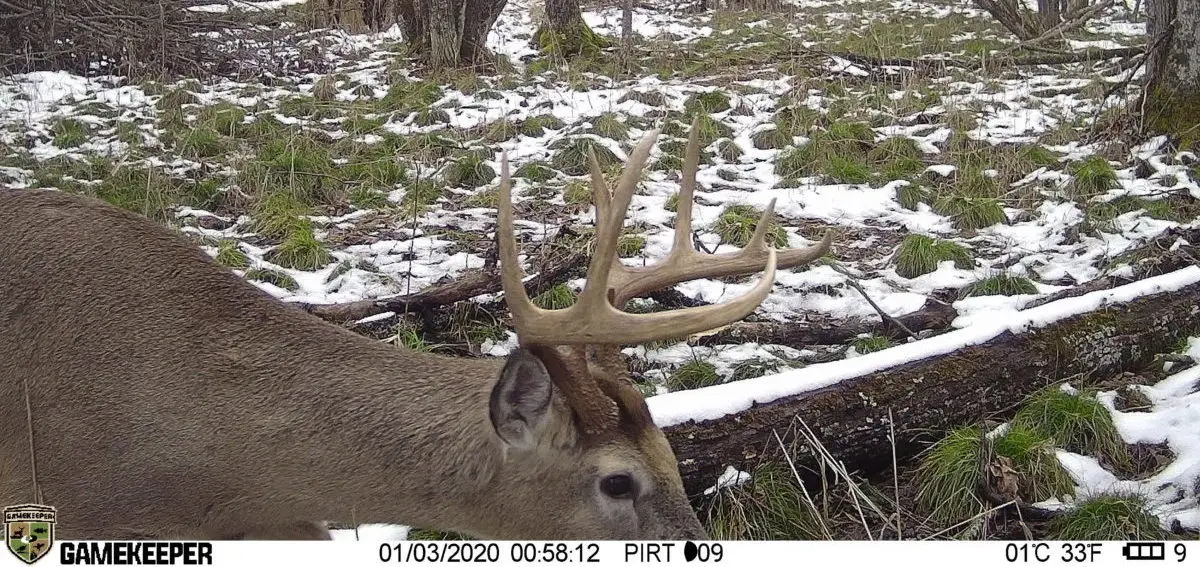
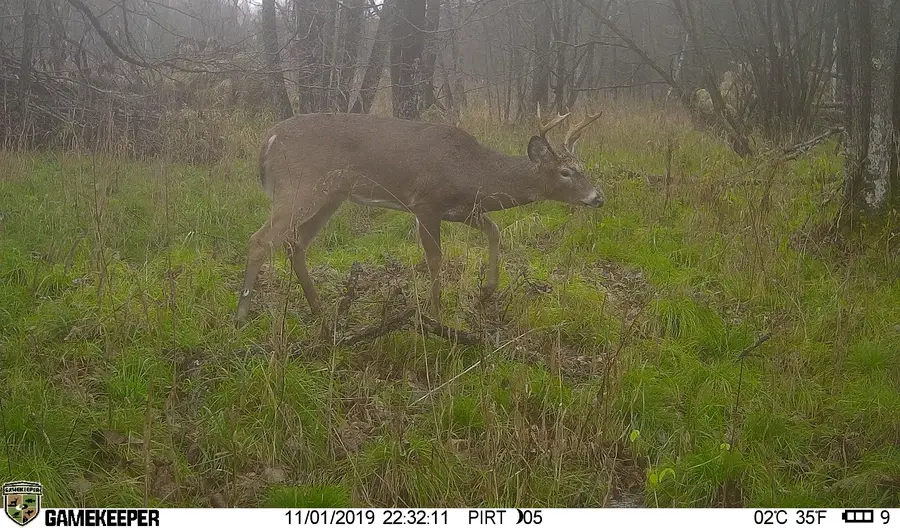
You have a photo of a mature buck on trail camera. Now what? Do you set a tree stand in hopes of his return, or do you tromp through the woods looking for any sign of where he might have come from? For those of us with limited amount of time, the answer is very simple, we strategically move trail cameras and allow them to do the work for us. We just need to know where to move them.
This is part 2 of a 3 part series on using trail cameras on public land. In part 1 we looked in depth on how to find public land that holds mature deer, and how to verify that they are there.
Now that we have confirmed that a piece of public land is holding mature deer, in this part of the series we will look at finding patterns of those deer, back tracking them between food sources and bedding areas, and dissecting movements to give you the best opportunity to have success.
In part 3 of this series, which you can find here, we will look at how to analyze the data that the trail cameras give us to better understand when and why they are using certain movements, and how you can choose when to hunt, and when to stay away.
Patterns
If you read part 1 of this series you now have a good understanding of what type of deer a particular piece of public land holds. With a year’s worth of historical data, you also have a good understanding of which trail cameras were the most productive, and which areas you really didn’t have much movement.
Now, it is time to begin to put together patterns on deer. You can pattern a specific deer, or the movement of deer as a whole. On public land, I prefer to pattern the movement of deer, specifically bucks, rather than a single buck. The reason for this is 3 fold:
- On large expansive pieces of public land, patterning a single buck can be similar to finding a needle in a haystack
- A single deer’s personality can be dictated by pressure, the rut, and other deer in the area. If you focus all of your efforts on one single deer, the simple movement of a doe in heat, or a stray dog running through the woods, could send a particular buck anywhere and subsequently you on a county wide wild goose chase trying to find him.
- Locations are much easier to pattern than a single deer. If you can find a location where you can pattern multiple mature deer, your odds of being successful are much better.
Looking back at the historical photos you have captured over the course of the last year, you might find some areas that were more successful in capturing mature deer than others. One thing to key on is if you had multiple pictures of the same deer, at the same location. While we are trying to pattern locations rather than specific deer, a specific deer at a location gives us a base to pattern from.
I often use the old fisherman’s adage, which happens to be an adaptation from an Ian Fleming quote in his book “Goldfinger,” : If it happens once its chance, twice its coincidence, and three times its a pattern. The same priniciple applies to trail cam photos as it does to fish biting.
Over the past 15 years I have collected hundreds of photos of mature bucks, that walked by the camera one time, and then disappeared, never showing back up. While its exciting to see a mature buck that gets your heart pumping, if he is one photo and done, you have nothing to base a pattern off from. I could have spent the rest of the fall sitting over top of that trail camera hoping for his return, but the truth is, if he walked in front of my camera simply by chance I would waste an entire season looking for a deer that just happened by rather than patterning a deer that I have intel on.
So, spend the next few hours looking over trail camera photos and determine if you have any deer that used a specific trail as a pattern (3 times of more) or if they are simply by chance.
Once you locate those deer that have created a pattern, something that you could substantially work with, you need to focus your attention to two specific things: Time and Date
Time
Pay close attention to the time in which these patternable deer moved past your camera. Was it in the middle of the night, or during daylight hours? If it was in the middle of the night, exactly what time were they going through? If the time stamp on your camera indicates that it was just after sun down, or just before sun rise, you are likely closer to his bedding area. If the time is around 2AM you might have a lot of work ahead of you as you could be as far as a few miles from food or bedding.
Find as many patterned deer as you can that are in daylight or closer to daylight. Those are the areas in which you are likely to have the most immediate success. While we can still find those deer that walked by in the middle of the night, the patterns you will begin to find are a little more sporadic and more complicated to pin down.
Date
Focusing on the date is when historical data really comes in handy. Deer tend to have not only daily patterns, but what is even more predictable is their yearly patterns. If you find a deer that is in an area for multiple days, and then disappears, there is a good likelihood that that deer, or another deer will be back in that same location the following year. There was a reason for him being there when he was, whether it was a hot doe in the area, or a seasonal food source like a pin oak, he had a purpose.
Spend the time looking at the deer that showed up on more than 3 occasions, and during or near daylight hours. Then put dates to these these visits. All three of these are excellent pieces of a much larger puzzle.
Moving Cameras
Now, lets take a small step backwards, and focus on those cameras that were not productive in finding patterns. In Part 1 of the this series we used cameras in a string, in order to gain as much intel as possible about the area. At this point, however, if the camera is not producing patterns it is time to move that camera in order to begin to pinpoint more specific areas in attempt to create those patterns.
If one of your cameras took a single photo of a deer that made your heart jump, it might be difficult to abandon that location. I can sympathize with that gut feeling, but it helps to remember that you will not pattern that deer from that location. It is time to spread out and focus on small areas that might attract deer with more consistency.
If you can not find these areas, or they do not present themselves to be easy to find, don’t worry, these are the areas in which we are going to find through backtracking (more on this in a moment). But if you have been able to locate them, moving cameras to these locations can speed up the process of patterning deer.
Food Sources
There is a misconception that deer feed only at night. But the truth is that a deer will feed up to 5 times in a 24 hour period, making food sources one of the best options for establishing a pattern for mature bucks. Move some of your trail cameras to these locations, to begin to narrow down which food sources are the most visited in the area.
Oaks
In the fall there is very few food sources that attract deer at such a consistent rate as oaks. Whether it is pin oaks, red oaks, or white oaks, they are all a targeted food source at some point throughout the fall.
Oak Flats
In general large oak flats are difficult to cover with a single trail camera. To cover a large area in which deer randomly filter through browsing on fallen acorns is nearly impossible. The truth is however, deer will not typically find themselves in the middle of these flats during the middle of the day.
Similar to a crop field, however, deer will access these areas from a few selected trails. Take a quick walk around the perimeter of these large flats and take notes of the heaviest used trails that enter into the food source. You will quickly realize that 90% of the traffic into the oak flats can be covered with 2 or 3 trail cameras.
Isolated Oaks
Isolated oak trees can become the holy grail of food sources at the right time of year. As oaks begin to drop their acorns during the fall, deer will focus on these isolated trees first. They tend to be secluded, giving deer the sense of security as they feed.
A few deer can make quick work of the amount of acorns only a few trees can produce, so these spots are very much time sensitive, and will only give you good intel for about a week. The information that these locations provide however will be incredibly vital during part 3 of this series as we break down and analyze the information our trail cameras give us.
You can find isolated oak sources in many different locations, including marsh islands, openings in conifer stands, on points of ridges, and along the edge of walking paths. The more isolated these locations are, and the more cover that is around them, the more comfortable deer will be to use them during daylight hours.
Fruit Bearing Plants
When you think of deer and fruit bearing plants, your mind automatically turns to apple trees. And, yes, apple trees are one of the single most attractive fruits to a deer. They naturally grow wild, and will congregate deer in small isolated locations, making the ideal spots to catch them with a trail camera.
Apple trees however are not the only natural growing fruit in the woods. You can often locate many different types of fruit sources such as wild strawberries, huckleberry, and raspberry. While these types of fruits may be harder for you to find in the woods, deer will flock to them as long as they are producing new growth greens, and berries.
Clear cuts
For whatever reason, clear cuts are often overlooked as a food source for deer. Most people associate these areas of early succesional growth as more of a rich environment for bedding. Which is the exact reason deer target them for food.
The ability to bed and feed in the same area, to a deer, allows them to eliminate unnecessary day time movements that make them vulnerable to predators.
Setting trail cameras in these areas are extremely difficult due to the heavy vegetation. Your best option is to set your cameras around the perimeter at a few heavily used trails that are going in and out. You will most likely get the majority of your photos from dusk until dawn, but that information is uniquely valuable as you can just about locate food and bedding with the use of just a few camera sets.
Bedding Areas
While deer may eat up to 5 times a day, they spend the majority of their time during daylight hours bedding down. So finding their bedding areas is one of the biggest keys to being a successful hunter.
Doe Bedding
Doe bedding is where family groups of does generally bed. These are often closely related to food sources. Most often you will find that doe families have only a handful of bedding areas that they use throughout the year. The bedding area they use might change throughout the year depending upon availability of food sources. Since, doe families bed in a circle, these beds are not based on wind direction or weather conditions.
When you find these areas, the best trail camera setup you can have is setting your camera on a trail that is on the down wind side of bedding. This is particularly effective during the rut, as bucks will cruise the down wind side of doe bedding to scent check for possible does who are in heat.
The historical data you can collect from these locations are incredibly important on patterning bucks. If a doe is in heat you will find that there is an unusual amount of buck traffic in the area for a number of days. Take note of these exact dates, as the same doe will go into heat during the same dates every year. While you might not find the exact same buck every year, you can set your watch on the parade of bucks who are vying for her attention.
Buck Bedding
Bucks spend the majority of their day in their core bedding area, making locating these locations vitally important in patterning them. Some buck beds are easily located by simply searching for small pieces of high ground in a cattail marsh, while others can be extremely difficult to to figure out. If at this point you can locate a buck bed or two, you are ahead of the game.
The important aspect of setting up cameras to monitor a bucks bed is to refrain from getting too close. Every bed has two two trails that enter and exit. The first one is the deer’s primary trail, when undisturbed he will naturally use this trail. The second trail is what is called a back door, where he has an alternative exit route in case of danger.
Placing cameras cameras on these trails 80-100 yards from the actual bed, will give you all the information you need to decipher when and why he uses the particular bed. Hang the camera high and out of view, and only use black flash trail cameras in these areas. If he notices the camera, he may relate it to danger and move out of that bed.
Buck Sign
What better way to find bucks than pinpointing specific buck sign. These three buck signs are great for targeting their movements.
Scrapes
Scrapes are a hub for deer communication in the area. Both does and bucks will visit scrapes leaving behind their scent. Not all scrapes are the same however, as some are used for rutting purposes, others are used to mark territory, but the scrapes that you are interested in for long term data are what is known as community scrapes. These scrapes are used nearly all year long, and will bring in the most intel in patterning buck movement. There are three things that are required to be a community scrape:
- Licking Branch- A licking branch, is a branch that overhangs a scrape. These branches are used by all deer to rub their preorbital and forehead glands. These glands are used by deer in order to identify each other.
- Size- The size of the scrape does actually matter in terms of community scrapes. The more use a scrape gets, naturally the bigger the diameter and the deeper the scrape will be worked into the ground. A large community scrape means the scrape has been used for more than just a 3 week rut window.
- Good Location- While a rut scrape and a territory scrape can pop up just about anywhere, a community scrape tends to be located in a centralized location, like near a food source, or outside a bedding area. Places where a deer is likely to move by on a regular basis
Rub Lines
Dissecting rub lines can be very beneficial to understanding the movement of bucks in a particular area. The problem with rub lines is that bucks will periodically rub trees just to rub a tree. This might consist of rubbing to release aggression, and sometimes to mark territory. The rub lines that you need to focus your trail camera setups on however, are those that not only have fresh rubs, but older historical rubs as well.
Bucks often rub areas that lead back into bedding, or along travel corridors that they frequent often. These areas are habitual in nature and although can be very difficult to monitor, can be incredible areas to gather vital pieces of the overall picture of their movements.
Rub Clusters
Rub clusters are one of my favorite, yet often overlooked areas for finding bucks. If you are having a hard time simply even locating a buck, these areas are prime to attract them.
Rub clusters are simply small pockets of early successional growth where bucks have created many rubs. Sometimes, in high populated areas, you can find upwards of 100’s of rubs in a small quarter acre area. For whatever reason, it seemingly attracts nearly every buck in an area at least once throughout the year.
It is important to note, that the reason we did not set cameras at these very specific locations to begin with is the fact that we didn’t know what type of deer this piece of property holds. If we focused a camera on a single apple tree, it might be that only a yearling buck visits that location, giving you a false impression of the quality of deer in the area.
In order for you to have had a better understanding of the area as a whole, we focused on long range movements, which gives you a better scope of the entire area, and the type of deer that it produces. Finding specific areas where deer feed, bed, and where bucks frequently visit can be extremely difficult. In order to find some of these locations, that are not immediately apparent, we need to use trail cameras to back track bucks.
Back Tracking Bucks
Now that we have all of our original cameras from our string that had patternable deer, and placed the remainder of our trail cameras in areas of interest, such as food sources, bedding, and areas with traditional buck sign, it is time to begin to back track bucks.
There are two main philosophies in back tracking bucks, leap frogging cameras, and establishing three points of contact. Leap frogging tends to be easier and more precise in establishing a pattern, but using the three points of contact method, if done effectively, will produce patterns much more quickly.
Leap Frogging Cameras
Leap frogging trail cameras is identical to the way you played leap frog as a kid. One kid stays put kneeling down, and the other leap frogs over the kneeling child. Then, the kid who was kneeling stands up and leaps over the one one who just leaped him.
Doing this with trail cameras is the exact same method, except I recommend using three cameras. Start with the camera you have found a pattern of deer activity (3 photos or more) and leave that camera in the same location. This camera will give you the ability to have a constant. If you are still picking up a patterned buck at that location, but have not found him on another, you know he is still around, and that your other cameras are not on his pattern.
Determine Direction
Now that you have a base camera, you need to determine which direction will get you closer to the deer’s bedding area. If the photos that you have received up to this point are at or around the evening, you are going to want to focus on the direction that the deer is coming from. Conversely, if the photos are in the morning hours, you want to focus your attention to where the deer is going. The reason for this is that we want to push closer to a deer’s bedding area, where he is more likely to move during the daylight hours.
Positioning Cameras
Now that you have determined a direction you are going to focus on, walk the trail that deer came on in that direction. Pay close attention to any areas where the trail splits or joins with other trails, rub lines, or scrapes are all indications that he might join that trail or veer off. At this point we know the deer is in the area, and we do not want to let any possible divergence to go unnoticed.
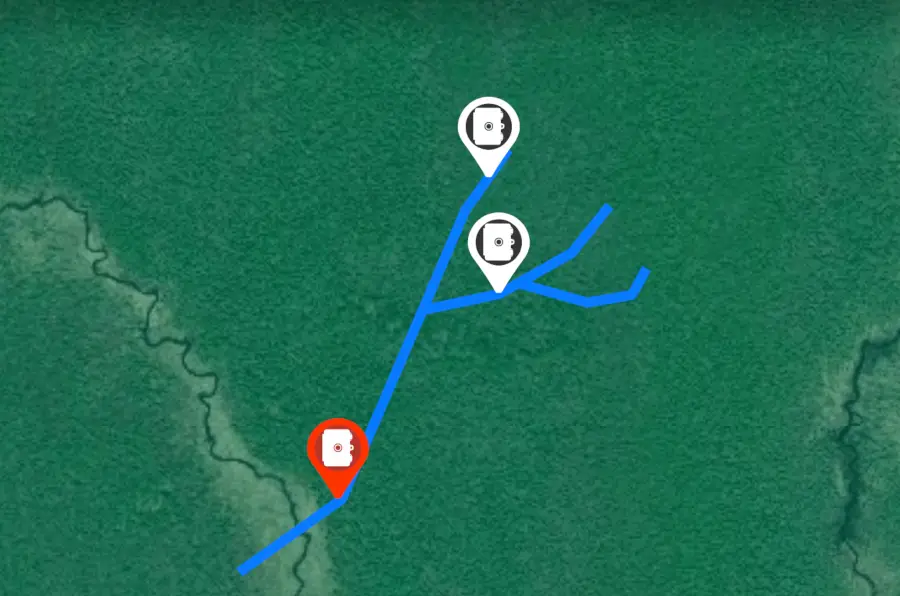
Blue Lines- Deer trails from that original location
White Trail cameras- New locations for trail cameras
This is why I use 3 cameras instead of two. When there is a possible location that the deer could come from two different directions, I place one camera facing the area he could use, and continue walking on the original trail until I find another potential divergence from the trail. This gives you the ability to survey two different areas the buck may travel, all of which leads back to the same trail. In essences you are covering twice the amount of ground making the process of patterning a buck a bit quicker.
Leaping Cameras
Once one of your two new cameras have established a pattern, that you can verify with your camera in the original location, it is time to leap frog your cameras. Take the camera that did not record a pattern and walk it past the camera that did, until you have find another potential divergence in the trail, and hang it there.
You will continue to leap frog one camera over the other every time you have established a pattern. Keep doing this until you find a location that has created a consistent pattern of daylight movement. While you could continue to push closer and closer to where the bucks are coming from, the goal is to find a position in which you can hunt mature bucks during daylight hours. The risk of moving outweighs the benefit of getting closer.
This method of leaping one camera over the other can get you to your final location as quickly as two weeks, or can take years, especially if the deer’s movement in that area is seasonal. With the leap frog method however, if you are thorough, you will ultimately find exactly what you are looking for.
Three Points of Contact
When using the leap frog method, we used a total of three trail cameras. That is a nice option for those on a budget. The three points of contact method is a bit more strenuous on the wallet as you could use as many as 8-10 cameras. The upside however is the ability to find a buck pattern more quickly.
The object of this method is to find 3 places in which you are able to get a pattern of a deer. This idea is an adaptation of needing 3 points of contact in order to draw a straight line. If you find 3 camera locations that are able to record a pattern, it is easier to draw a line from where he is to where he is going.
The same principle of determining a direction of travel that you used in leap frogging cameras applies in this method. Find the direction that makes the most sense for more daylight photos and focus on that area.
Positioning Cameras
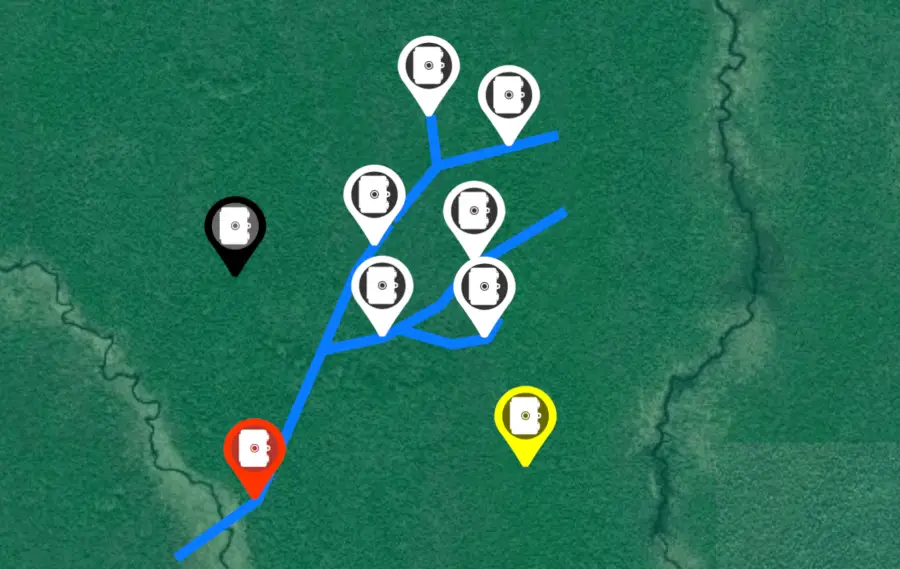
Blue Lines- Deer trails from that original location
White Trail cameras- New locations for trail cameras
Yellow Trail Camera- an active community scrape
Black Trail Camera- Isolated Oak tree
For the first 5 or 6 cameras you are going to want to spend time walking the trail in the same direction the deer was going. Exactly the same way you found possible locations of a deer diverging off the trail, in the leap frog method, you are going to want to place a trail camera in those areas. The difference here is that you are not waiting for a pattern before moving them, you are placing all of your trail cameras in those locations to begin with, essentially blanketing the trail and all of the potential turn offs with your trail cameras.
With the remainder of your trail cameras you want to focus them on as many of those food sources, bedding areas, and buck sign as you can find in the general direction of the deer’s movement. The reason for doing this is simple, deer make deer sign. A few cameras in these very specific locations, where deer are obviously at, might speed up the entire process of creating 3 points of patternable contact.
If in the case you only get two points in which you are able to establish a pattern, it is time to take the cameras that are not receiving a pattern and move them surrounding the cameras that are.
If you are able to establish 3 different locations in which are producing patterns within a 400 yard area, you can then go back into your virtual maps, and begin to connect the dots, establishing a direction in which the deer travels.
Using this direction, you can virtually pinpoint the deer’s travel corridor, and with only moving trail cameras a handful of times, can pattern a deer’s day light movements.
Final Thoughts
Which ever way you choose to backtrack bucks,whether it be by leap frogging cameras, finding three points of contact, or just randomly spreading cameras out, it is important that you begin to find a pattern of their movement. The more pictures you can acquire, the more information you will have at your aid. This is all vital information in the final stage of this series: Analyzing Data from Trail Cameras.