
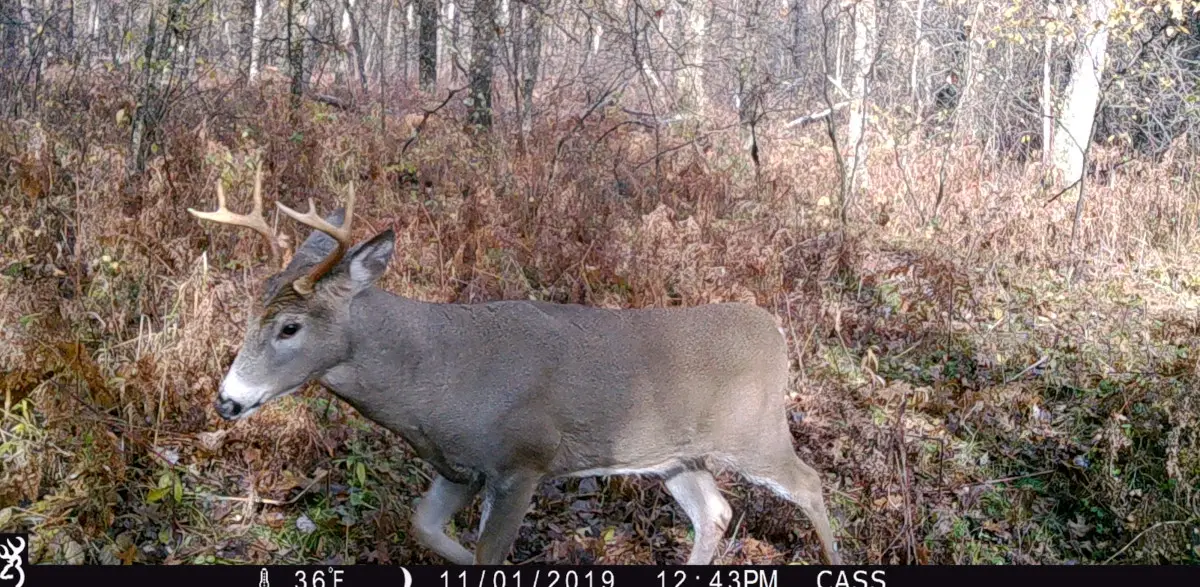
Some say a picture is worth a thousand words, but a trail camera photo that has been recorded and analyzed could be worth a mature buck on the ground. The most important part of a trail camera picture, is not the picture itself, but rather the information that pictures represents.
In the first article of this series we looked at how to use trail cameras to find public land that holds mature deer. In the second article we focused on backtracking those bucks to food and bedding areas. As the final installment in our 3 part series on trail cameras on public land, we will dive deep into the area of recording and analyzing trail camera photos to find specific patterns of why and when deer move through particular areas, giving you the best information on planning you next hunt.
Organizing Trail Camera Photos
With hundreds if not thousands of trail camera photos, the biggest step is to organize your photos in a way that make sense to you. Since my focus is typically on patterning locations, rather than specific deer, I tend to break up the photos based on property and location.
For instance if my hunting property is on Luce road, I would create a folder on my desk top that says Luce Road. Inside the folder, I would have separate folders for each location I have begun to formulate patterns, such as apple tree or North Bedding area. Its important that the names of these places make sense to you, and you can immediately know where they are at. I have a folder that I labeled “mineral spot.” It is a location that 10 years ago I ran a mineral lick to get inventory. For what ever reason the term mineral spot stuck.

Now for renaming photos. From my previous example I have a name for the property (Luce Road), and a name for the location (Apple Tree). When I rename photos, I make sure to use an abbreviation to both the property and the location. Luce Road would be abbreviated LR, and Apple tree would be AT. I also will use a system to identify the animal, typically by counting the tines on the antler, expressed like 4×5. The 4 would be how many tines are on the left side of his antler and the 5 would represent the right side.
When you collect more than one photo of a particular deer you will want to begin to number them in order using parenthesis. If it is the 3rd time I had captured photos of the deer, I would simply add (3) to the end of the name of the photo.
The new name for the photo would look something like: LR_AT_4x5 (3). Just looking at the name of the photo I know that this deer was at my Luce Road property, at the location of the apple tree, and it is a 9 point buck with 4 on the left and 5 on the right, and it is the 3rd time I have gotten a photo of this particular deer.
Now comes the tedious part of renaming all of the trail camera photos you have collected. Be smart about it, you do not need to save every single photo collected, just the ones that that give you important information. If you are located around a doe bedding area, you might want to keep some photos of does. If you simply want to shoot a buck maybe every antlered deer needs to be logged, or maybe just a buck you would consider to be mature. Be sure, however, to keep all photos that have shown signs of being a pattern. This in the end will help clarify a lot of mystery about your location.
While going through all of your photos and renaming them, and then copying them to the correct folder, will take some time, the idea of being able to look at the name, and understand the property, location, and the particular deer, will be very important when you begin to chart the patterns of particular areas, and deer.
Charting weather, date, and time
Now that you have all of your photos organized and renamed, it is time to find out when and why these bucks visit a particular location. I find the easiest way to chart these locations is by using a spread sheet. Whether you have a spread sheet available on your computer or you need to use Google’s free version Google docs, it is important to find a spread sheet that you can input data, and compare photos, days, weather, and time of each of these photos.
Because we are looking at patterns from individual locations, I would recommend opening up one tab for each location. This will allow you to pin point patterns with weather, days and time for each individual location easily, without getting cluttered with information.
Start by listing all of your photos in the first column, and then go through and fill out the dates and times of each photo in the next two columns next to it. At this point your spread sheet should look like this:
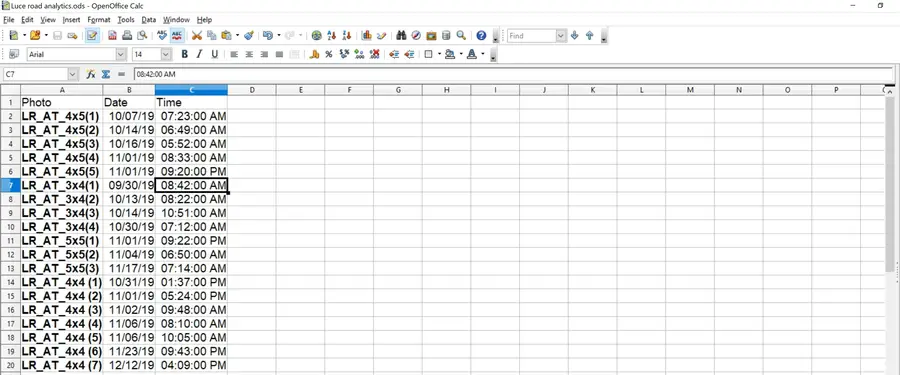
By simply sorting the data in order by date or time, you will be able to see that early November, during the morning your trail camera received the majority of it photos. But, just by having a time and date, doesn’t give you the whole story, and doesn’t give you the best day to hunt. It is just a small, albeit important, piece to the puzzle. Now is time to focus on other factors in the equation that will help you pinpoint the perfect conditions to hunt a particular area.
In the first row, fill out possible weather related conditions that you feel might contribute to deer using that location. Some of the ones that I personally use is: Temperature, wind direction, wind speed, barometric pressure, pressure rise or drop compared to the previous day, and precipitation. You can use as many factors as you want, including moon phase, high tide and low tide, pollen in the air, or anything else you might find interesting.
Using historical weather websites like weather underground or Time and Date, you can go back and look at all of these weather related factors for every day you have a photo. Fill in the spread sheet, and collect as much data as you can. Every bit of information you can collect, might be able to pinpoint an exact pattern that thee deer will follow.
Finding The Pattern
Now that you have all of your data recorded inside a spread sheet, you can begin to look for patterns. Use your spread sheet to filter through each category, by reordering it. Its a very simple process, that will allow similar data to be grouped together, making it simple to find trends with each individual factor.
Just like in part 2 of this series of trail cameras on public land, we used the old fisherman’s adage one time is by chance, 2 times is by coincidence, but 3 times is a pattern. Look at the conditions that happen 3 or more times. You might find that the most common theme is a combination of things such as a NE wind direction, with cloud cover in the first week of November. Or it could simply be based on the barometric pressure.
In this specific example you can see that 13 out of the 18 pictures that we collected data for has some version of a South wind, in combination with most of the pictures coming from the first week in November. While in this portion of the country the majority of our wind directions come from the North and West, which makes this bit of data incredibly important.
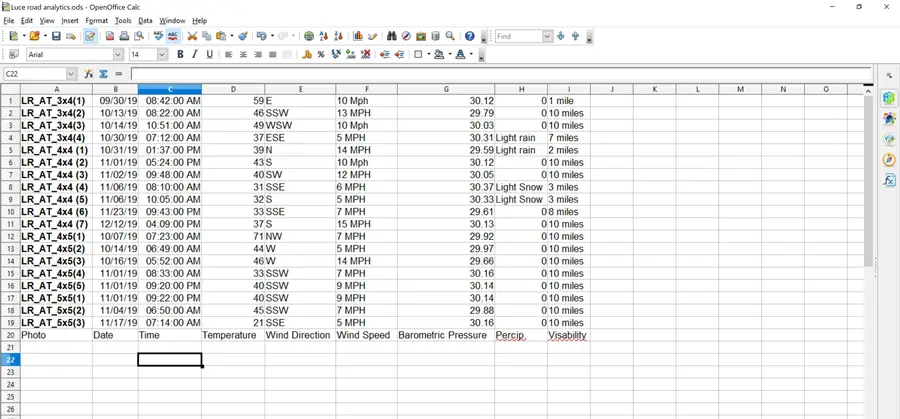
This information is likely to equate to a deer’s bedding area that is wind based. Meaning that in early November with a South wind, there is a strong chance a buck is in that immediate area. This is a pattern that will give you extremely good odds when it comes to these conditions.
The deeper you dive into these statistics, and the harder you search for the little nuances that might have moved the deer in front of your trail camera, the better informed you will be when planning your hunt.
Planning Your Hunt
The ultimate goal is to have as many properties and hunting locations that you can and to analyze them to find the most intricate patterns of deer. The more locations you have, the more patterns you will be able to find, giving you more opportunities to hunt on any given day. If the only location I had, was the one I just used as an example, I would have to sit and wait for those perfect conditions.
With each location you will have dates, times, and weather conditions that you can consider ideal. Look ahead at the projected weather conditions during your hunting season. Plan to hunt each location on the day that you have the optimal conditions, and be willing to adjust as the weather changes from day to day. If you hunt enough locations on the most optimal days, you can tip the scales in your favor year in and year out.