
As days go by, it seems that there is a decreasing amount of time to keep up with things that are not of immediate importance. Do not let the lack of time in your day keep you from properly winterizing and storing your trail camera though. Completing proper measures to assure that your trail camera is cleaned, updated, and stored will increase the life of a trail camera, and keeping it working at optimal performance.
Because time is precious we laid out a step by step guide on how to properly care for your trail camera after the season is over. This entire step by step guide can be completed from start to finish in less than 10 minutes, saving you that valuable time, and ultimately saving you money.
Tools You Will Need:
- Batteries
- SD Card
- Computer
- Air Duster (compressed air)
- Baking Soda
- Q-tips
- Microfiber cloth
- Silicone based rubber seal protector
Step 1- Dry Out Your Camera
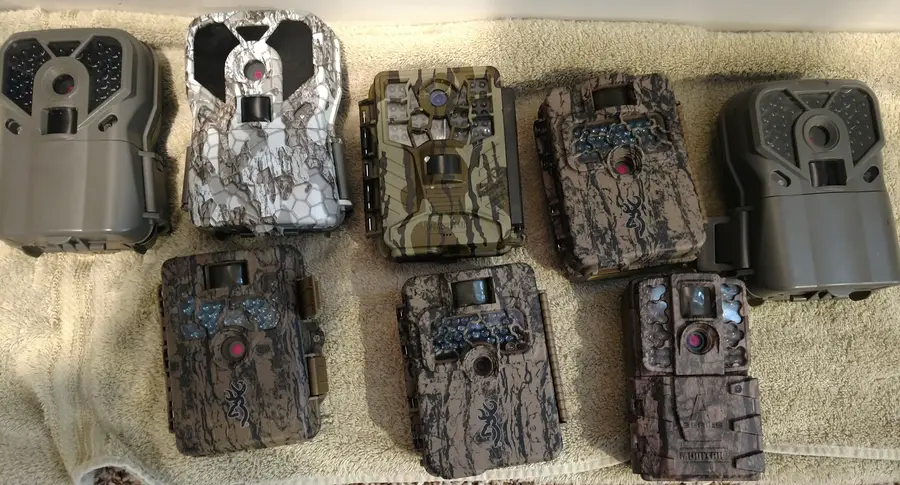
Most often when we are bringing our trail cameras in from the field, it signifies either the end of the hunting season, or the sign of tough winter weather. What ever the case may be, your camera is likely to have moisture build up from snow, rain or ice. Before you do anything, it is a good idea to bring your camera up to room temperature and allow the moisture to evaporate before winterizing them.
Simply lay your cameras out on an old towel and allow them to sit for a day or two. Doing this will allow all of the moisture buildup to dissipate, and the access run off will be collected by the towel. Simply wiping the camera off might seem like a good idea, but allowing the camera to sit will give the moisture buildup within small crevasses to evaporate.
Step 2- Format SD Cards
Formatting your SD cards is an important step in having good SD card management. It allows the SD card to format to the specific camera, as well as keeping possible harmful software that was picked up from your computer or other devices from getting onto your trail camera. We have a very good reference to formatting SD cards in trail cameras, if you need any help with that.
The most important reason to format your trail camera when winterizing is for the use of the SD card to update the firmware. Be sure though that all of your photos that you want to keep are safely downloaded onto your computer before formatting your SD card, as this process will delete everything on the card.
Step 3- Update Firmware
Taking the time to update your trail camera’s firmware is probably the one step most people neglect the most. It might seem confusing, or overwhelming the first time you try it, but trust me it is not very hard.
It is however probably the most important step to keeping your trail camera running the longest. Updating the firmware not only fixes any bugs that the manufacturer might have found along the way, but keeps your camera operating at its best level. Don’t skip this step, it takes just a few minutes, and will save you frustration with the inner workings of your trail camera down the line.
If you are unsure how to complete this step, you can check out our step by step guide on how to update a trail camera’s firmware
Step 4- Remove SD Cards and Batteries
It is important to never store your trail cameras with the batteries and SD cards still inside. Batteries are corrosive by nature, and if one of the batteries happens to leak, it can cause damage to the battery ports, and if the acidic leak is able to find its way into the inner workings of your camera, it has the potential to completely ruin it.
When an SD card is pressed inside your trail camera, there is a small spring that stretches. While I have never seen an instance in which this spring has been ruined by leaving an SD card in, it is good practice to store your SD card in an SD card case. Removing the card will also help in cleaning the port in the next step.
Step 5- Used Compressed Air
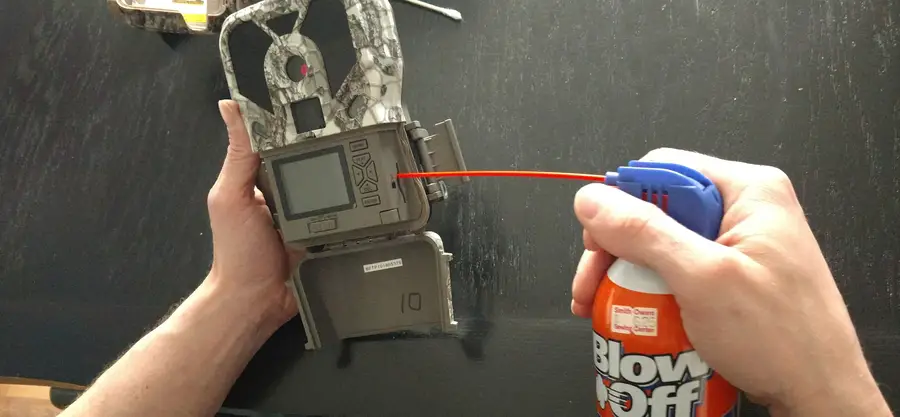
Since your trail camera has been out in the field for a good amount of time, it is likely that there is dirt, pollen and debris that has collected onto your camera. The easiest way to clean off this debris is by using a can of compressed air, the same type you would use to clean off the keyboard to your computer. We recommend compressed air over a cloth or even a Q-tip at this point because using a micro fiber cloth and wiping dirt and debris over some surfaces may cause scratches. The compressed air can also get into areas that even a q-tip cannot.
When using compressed air to clean off your trail camera be sure to spend special attention to the camera lens, the PIR sensor and the light meter, as any grain of sand has the ability to scratch lenses. If you have a battery tray remove it and spray into the housing, and be sure to lightly spray air into the SD card port.
Be sure to use air on the outside of the trail camera as well. Areas such as recessed screw holes, latches and inside the camera’s housing door are all places in which dirt, grime, and even small insects often congregate.
Step 6- Clean Battery Ports
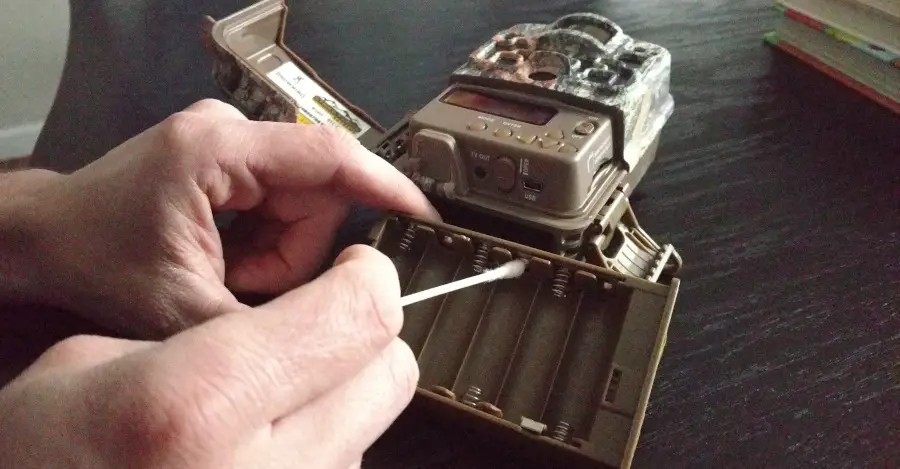
Some of the most common issues users have with their trail cameras often comes down to poor battery connection to the terminals. While this can be extremely frustrating in the field, when winterizing your trail camera, this is a simple step that can prevent those frustrations.
Cleaning these ports are a simple 3 step process:
- Mix baking soda with hot water
- Using a Q-tip apply the mixture to all of the terminals
- Dry. Never put your camera away with any sort of moisture. Simply take a cotton towel and wipe the terminals.
Step 7- Check Weather Proof Gaskets
Around the edge of every door on your trail camera is a rubber gasket. This gasket is vital in keeping moisture out of the housing of your camera. If this gasket gets cracked or damaged, it can have serious consequences on the longevity of the camera.
There are two types of gaskets that are typically used on today’s trail cameras. The first being an O-ring type gasket. This gasket is typically an 1/8th inch tubed gasket that if damaged, is simple for you to replace on your own. Contact your trail camera’s manufacturer and they will be able to send you the right replacement gasket.
The other type of gasket is known as a C or flat gasket. This gasket is used by most manufacturers, due to its ability to expand and shrink, giving it a longer shelf life. It is connected to the trail camera within the housing itself, and if damaged needs to be replaced by the manufacturer.
The most important thing you can do to keep the gasket from dry rot is to use a silicone based rubber seal protector. There are a number of different applications available on the market today from a spray bottle, to a cream that you can apply with a simple Q-tip.
Step 8 – Clean Lenses
Dirty and scratched lenses have an incredible impact on the quality of photos that your trail camera takes. You have already used compress air to eliminate and dirt that may have collected on the surface of your lens, PIR sensor, and light meter. These three areas need to be wiped down with a microfiber cloth to eliminate any possible smudges on the lenses.
After the lenses have been wiped down with a microfiber cloth, I like to clean the lens with a lens cleaning solution. Zeiss makes a reputable cleaner that comes in either cleaning wipes or a spray application. Make sure to clean the lenses thoroughly, as this is one of the small details, that will give better quality and longer life to your trail camera.
Step 9 – Clean Remaining Debris
Now that the battery terminals, moisture gaskets and lenses have all been inspected, cleaned and protected, it is time to go through the remainder of the camera and thoroughly clean the rest of the trail camera. Wipe down the outside of the camera, use a Q-tip to clean out the recessed screw holes and clean and inspect the hinges to any door. These areas all collect dirt, bugs and consequently larva from insects.
The goal in this final stage is to make sure that your trail camera is completely ready for the next time you use it. While trail cameras are built to be rugged and withstand all the elements of mother nature, taking the time to take care of the small little details in cleaning and inspecting will increase its life.
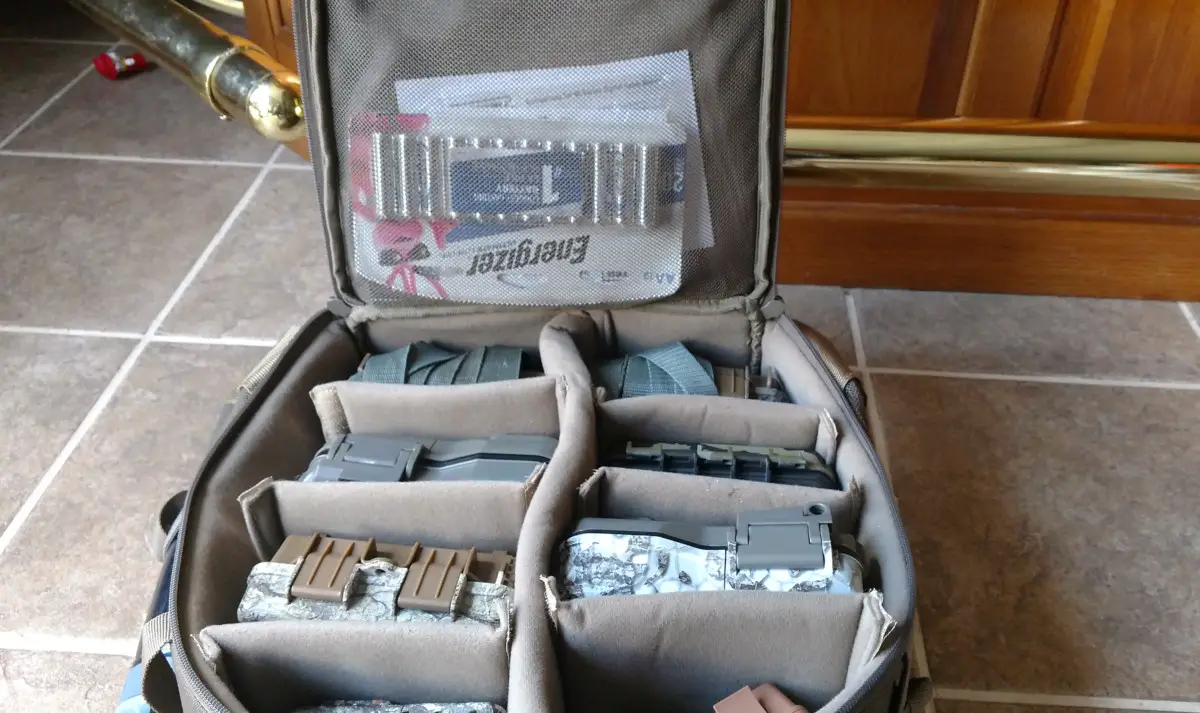
Step 10- Storing Your Trail Camera
Now that your camera is ready to be put away for the winter, it is time to focus on how you will store it. I personally put my cameras in my trail camera bag like the Alps Outdoorz Motive. This allows each trail camera to have its own protected space within the pack, keeping the camera from getting banged around. This also allows for me to place a few desiccant packets within the bag to help prevent from any sort of moisture.
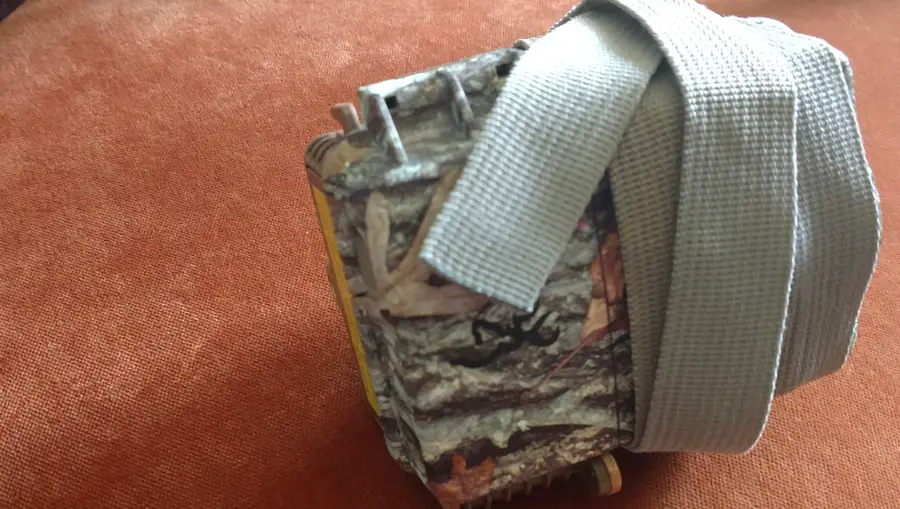
As for the trail camera straps, I personally take them off the camera and place them in a side pocket of the bag. If you prefer to keep your straps with the camera, wrap the camera straps so that the buckle is against the back of the camera and the strap is wrapped covering the lenses. This will protect your lenses from being scratched by the buckle and other trail cameras.
As we know, moisture is the biggest enemy to trail cameras, so it is important to store your trail cameras in a location that will not receive moisture. Placing them under your bed or on a shelf in your closet are good places that are typically climate controlled. Do not stick them in your garage, or leave them in your car for long periods of time, as climate often changes, creating moisture.