
We all love trail cameras. There is nothing like flipping through camera photos and then all of a sudden, out of nowhere, there is a picture of a monster buck staring into your camera lens. That feeling of excitement, anticipation, and wonder, begins to consume you, until it becomes an obsession.
You can’t wait to check your camera again to see if he returned. The wonder and anticipation eats at you, until you bite the bullet and a week later you are checking your camera again. Your addiction for another glimpse of this buck, in fact is hurting your chances of ever seeing him again, which leads you to the question:
How often should you check Trail Cameras?
There are only three instances in which you should ever check your trail camera:
- When you absolutely need the information on your camera.
- When you are directly passing by your camera.
- When your camera needs new batteries, and a fresh SD card.
In almost all other instances the damage you are doing to your trail camera set, and the surrounding area, far out ways the benefit of checking your camera.
What Entails Needing Information?
We all have felt the “need” to know what is on our trail camera. But lets face it, our need for knowledge is mostly just our curiosity of the unknown. Our desire to have that unknown information is what turns us into a trail camera junkie. We desire it. We crave it. We need it. Even to our own detriment.
Those who are the most successful at using trail cameras, are able to understand that pictures from a trail camera is data from the past. While there is a lot of information that you can learn from those photos, the information is historical. Running into a trail camera set, every other day, is likely to disrupt an animal’s routine patterns, making the information that you do receive less reliable in understanding their natural movements.
What is classified as needing information? Each circumstance can be different, but here is a few examples of when checking your cameras a little more frequently to gain needed information is more acceptable:
Surveys
Whether you are doing population density studies on your area, or trying to calculate fawn recruitment, trail camera’s are an excellent tool. In most cases, there is a need to move cameras on a bi-weekly basis to garner as much information about an area as possible.
If you are focusing your survey on wintering yards of whitetail deer, you might need to cover a few thousand acres over the course of a month or two. The routine feedback of their use of a specific area is information that is vitally important to the results of your survey. Getting the most information in the shortest amount of time is applicable.
Hunting Season
Most trail camera users, have trail cameras for the purpose of patterning game, to increase their opportunity for a successful hunt. While in season information can play a large role in their use, the most important information is the historical data, that will come into play the following year.
Historical Data
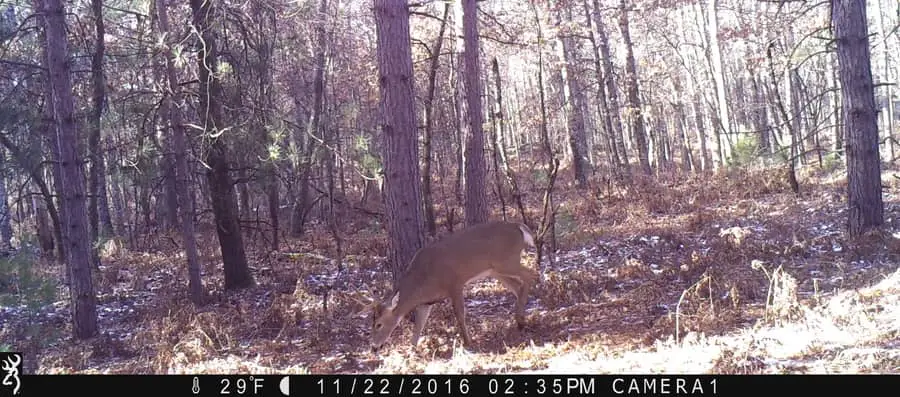
Animals in general change patterns on a seasonal basis. If you get a photo of a nice buck on November 3, the chances are, within a 3 or 4 day window the following year, there will be another deer, if not the same deer in the exact same area. There was a specific reason that deer was in that area during that time of the year. It might be as simple as a good crop of pin oaks, or he was scent checking a doe family group. Whatever the scenario, that information will provide more understanding of their habitual seasonal patterns.
In-Season Scouting
Most hunters use trail cameras as a crutch for their lack of time and sometimes their lack of ability to scout and understand deer movements (I find myself guilty of this from time to time as well). Rather than a crutch, we should use them as they are intended to be; a tool to enhance our understanding.
Checking your cameras for needed information such as the current destination food sources, the movement of doe family groups, and staging areas outside bedding, are all useful information that is applicable in the moment. This type of information will allow you to draw conclusions, of potential movements during daylight hours.
When you check your cameras to receive this information it is important to get in and out as quickly, quietly, and as scent free as you can. Once you are able to draw a definitive conclusion, your opportunity to hunt it, is at that moment. It will not take long for a deer to realize your intrusion, and quickly change patterns to avoid it.
During The Rut
During the rut, might be the only time throughout the year where you can get away with checking your trail cameras more frequently. A deer in heat changes his primary focus from survival and food, to does and breeding. You might bump a deer out of his bed, and two hours later, will catch him on trail camera chasing a doe back through the same area. His desire to breed may outweigh his attention to survival.
One aspect you may want to be the most conscience about is of the does that are not ready to breed. They are still completely focused on survival. If you continuously go into the same area and they become aware of your presence they will move out of the area, and during the rut bucks will follow the does.
What Are the Benefits From Leaving Your Camera Alone?
Animals, especially prey animals have a distinct ability to pattern predators faster than you can pattern them. It is a part of their genetic makeup and their evolutionary instincts to survive.
Deer for example have the ability to smell in layers. They have over 297 million olfactory receptors in their nose, compared to a drug sniffing dog, that can smell a triple rapped bag of cocaine shoved inside a gas tank, with only 220 million. When you walk into an area, regardless of what type of clothing, how well you shower, or what body spray you use, deer know you were there.
Eliminating human intrusion is the best remedy for keeping deer movements natural, which will equate to a more authentic representation of data set of photos on your trail camera.
When Should I Check My Cameras?
Choosing specific days, based on weather conditions and time of day is essential for planning when you should check you game cameras. Deer move most frequently during the morning and evening hours, so finding a time to during the middle of the day, will greatly reduce your risk of running into deer that are on their feet.
Finding a day that you are able to check trail cameras before or during a rain storm is also a good idea. A strong rain will wash away most of the ground scent around your trail camera sets, minimizing your impact on the area. Your goal is to make sure a deer does not see you, smell you or hear you, and by doing so, you are making very little impact on the area.
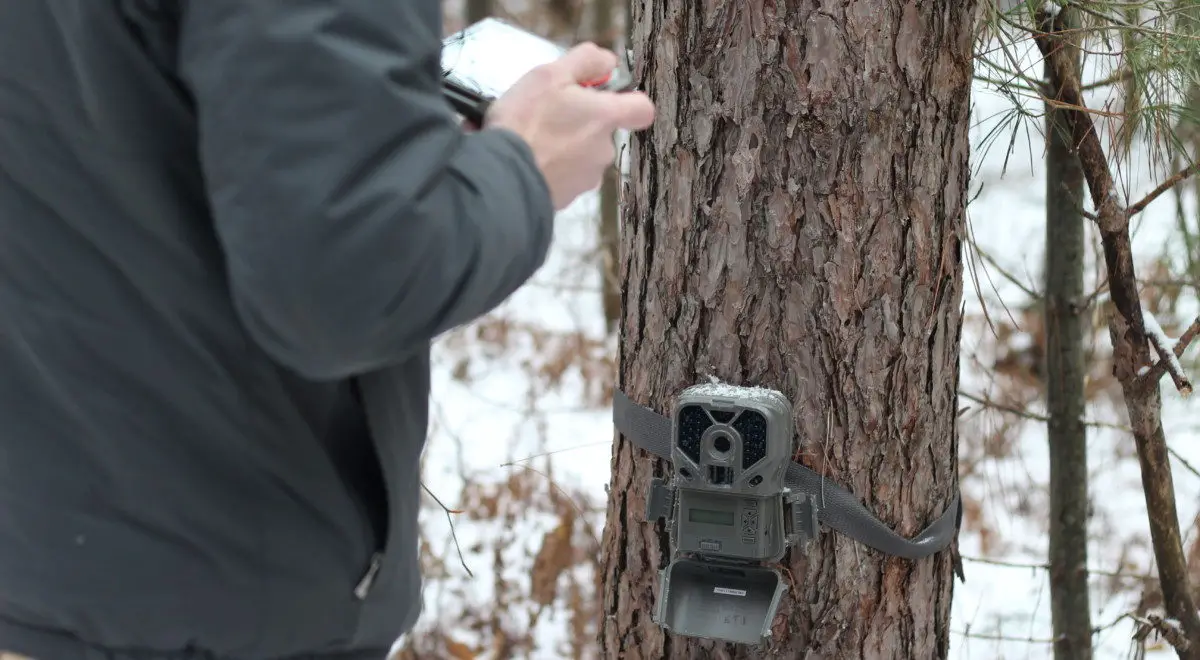
How Should I Check My Trail Cameras?
The how in checking trail cameras may be more important than when or how often. If you can check a camera quick and efficiently, without disturbing an area, the better off you will be.
Access
If you have simple access to a camera, that is located on a field edge or near a two track, the easiest and less intrusive way is to drive your truck, ATV or tractor right up to the camera, keep you vehicle running, and jump out and check your camera. Deer in these types of areas are often habituated to seeing human activity along these travel corridors. It is when you shut off the vehicle and begin tromping through the woods, that creates a disturbance to their normal interactions with humans.
For most camera sets however, they are likely to be deeper into the woods, along pinch points, saddles, and bedding areas, and often times on public land. To check cameras in these areas it is vital to know where deer tend to bed, and in which direction the wind is blowing. Accessing these trail cameras with the wind completely in your favor, blowing away from known bedding and feeding areas is the most important step.
Often you will have to circle down wind of a trail camera, or even enter the set from a cross wind, that will send your scent in the opposite direction. If the wind is not right, and their is no available access route you can take to reach the camera, it is highly advised to check that camera on a later date when the conditions for access are more in your favor. It is best to be patient and wait to check your camera than to mess up an area with poor access.
At The Camera
The most effective way to check your camera is as quickly as you can, while still getting all of the information that you need to acquire. Personally, I always have a bag that is dedicated for trail cameras. I use the Alps Outdoorz Motive, which allows me to keep all of my gear in the same place, for easy access, and less confusion when I am in the field.
When you approach your camera, be sure to always walk in front of your camera to make sure that it is still taking pictures. When you open the housing check to make sure there is still good amount of battery left before turning off the camera.
Slide the SD card out of the camera, and use a SD card reader to check the last few photos. I have really enjoyed the ease of use of the Muddy SD Card Reader, but there are a few others that I recommend as well. There is no need to flip through every photo, but it is important to make sure the last few pictures are of you moments before, and double check the date and time stamp to assure it is accurate.
If everything is in working order, replace the SD card with a blank card, turn the camera back on and close the housing. Be sure to walk in front of the camera again, making sure it takes a picture. Then you are quickly on your way to the next camera.
If everything with your camera is working properly it shouldn’t take more than a few short minutes to check your camera replace the SD card, and get out of the area to minimize any intrusion.
How To Keep Yourself From Checking Your Camera
Knowing we need to stay out of the woods, to better minimize our interference with natural behaviors, leads us to the question of how do we keep ourselves from going in to check cameras. The two methods that I have found to work the best is to either run cameras on multiple pieces of property, or use cellular trail cameras.
Using Multiple Properties
When the use of trial cameras becomes so much fun, you can not keep yourself from being in the woods, try running camera sets on multiple pieces of property. Limiting yourself to checking only one set of cameras a week, will give you the ability to scratch that proverbial itch, while spreading the pressure out over months and multiple pieces of property.
Cellular Trail Cameras
There is something about cellular trail cameras that are just not as fun as basic trail cameras. Maybe its simply the lack of the entire act of checking trail cameras, or maybe its the fact that you can get each picture one at a time, in real time, rather than hundreds all at once. Whatever the reason is, don’t discount the fact that Cellular Trail Cameras are an immensely helpful tool.
They work great for staying out of the woods as well. I personally like the Tactacam Reveal X because of its long battery life and ease of setup. But whatever cellular camera you choose, the benefits of having photos sent directly to your email, rather than physically putting pressure on an area, outweighs the cost.
You can place these cameras in sensitive areas, such as near bedding areas, and never have to disturb the area, until you go in to retrieve the camera after the season. And having less pressure around your camera sets, the more effective they will be.