
Once the fall hunting season turns to the cold harsh winters, the furthest thing from our minds is preparing for next year’s hunting season. After months of the grueling aspects of hunting; strategies, hiking, waking up early, staying out late, and letting your body take a beating from mother nature, we want nothing more than to leave the snowy winter season for snow boarders and cross country skiers. But there is no better time, than after hunting season, to gain vital information about the deer in your area.
Trail cameras are designed to be a tool, and the winter is the most effective time to use that tool to your benefit. There are three main trail camera strategies during the winter months, Each one gives you a distinct look at the health and viability of your deer herd, and will give you a jump on a hunting strategy for the next season.
The most important information you can focus your winter trail camera strategies on:
- Trail camera surveys
- Post Season Buck Inventory
- Winter Deer Health
Trail Camera Surveys
It seems as though whenever we set trail cameras out, we are conducting a type of survey. We survey the deer movements, we survey and collect an inventory of bucks, and we make mental notes of the amount of deer within an area.
While these surveys provide a lot of information that we use to benefit our hunting experience, they are not done in a precise way to maximize the knowledge that we can receive from our trail cameras.
Winter Trail Camera Surveys
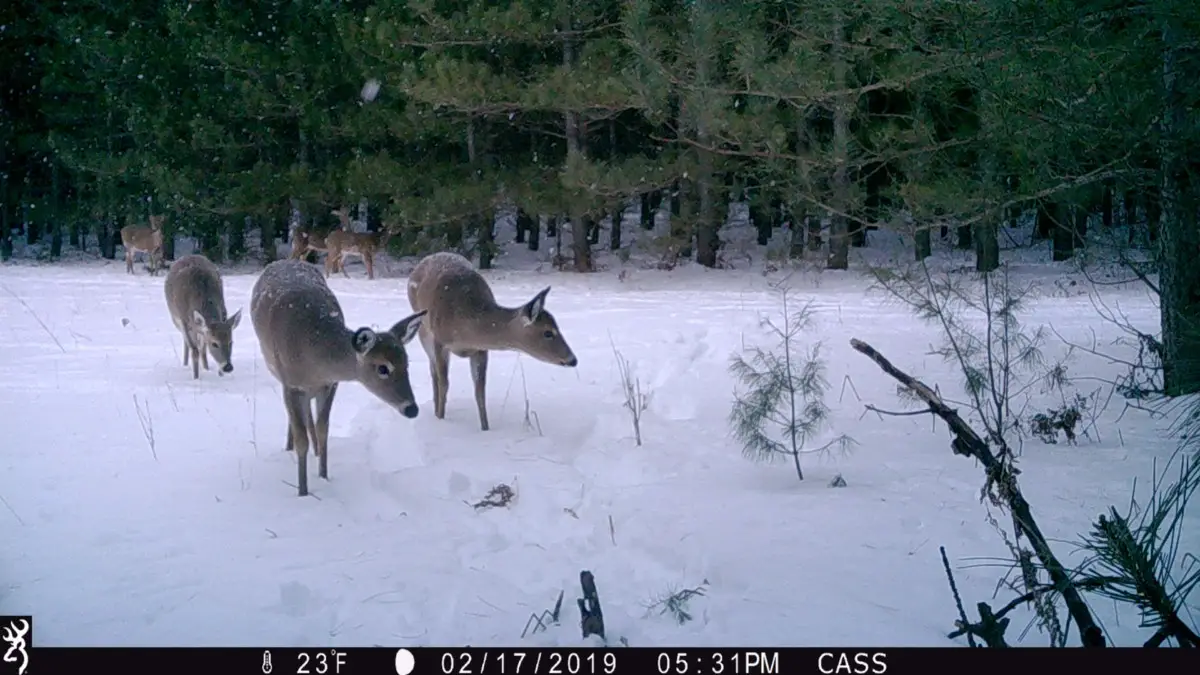
Winter trail camera surveys can be a little bit tricky. While in the summer our surveys might be focused around the number of deer we might have in a square mile, and the fall might be slated to figure out the buck to doe ratio, winter surveys are all about figuring out the fawn recruitment.
There is a lot of misinformation about what fawn recruitment means. Often times this type of survey is discussed with the amount of fawns that are born during the spring months. While the gestational survival of fawns is important, it is not exactly the same as fawn recruitment. The actual definition is how many fawns are recruited to breading age. This type of information can only be done accurately during the winter months after the two biggest threats to deer are essentially over; fawn predation, and hunting season.
The winter is also, an easier time to conduct these type of surveys because during the breading season, mature does, will often run off their yearlings when they come into estrus. This creates a more complicated dynamic of single deer on lone patterns. After the breading season is finished however, most doe fawns will join back up with their mother for the duration of the winter. When this occurs it will give us a better understanding of the ratio between does and fawns.
Importance of Fawn Recruitment Surveys
For most hunters, who are good stewards of the land, understanding the fawn recruitment is vital to insuring the overall health of the deer herd. An average recruitment rate between breading age does and yearling fawns is a 1:1 ratio. That means after the hunting season when likely a number of mature deer have been harvested, there is still one fawn for every remaining doe.
Having this information is not only just good knowledge to have, it will give you the opportunity to understand if your deer herd is being replenished on a yearly basis, providing vital information on your harvesting needs the following year.
How to Perform Fawn Recruitment Surveys
There are many different tactics to getting an accurate deer survey. Many people like to use a grid survey. This type of survey allows you to break up your hunting property into equal sections like a checker board. In each of the squares you place a camera in the most highly used areas. While this type of tactic works extremely well for buck to doe ratio surveys, and deer density surveys, I have often found that in the winter, there is a lot of wasted effort in breaking down a property into a grid.
During these winter surveys, it is not as important to get every single deer on your camera, but to rather get a general idea of the herd dynamics. Luckily for us, especially in the Northern Regions, deer have a tendency to group together, making a few well placed cameras all you really need.
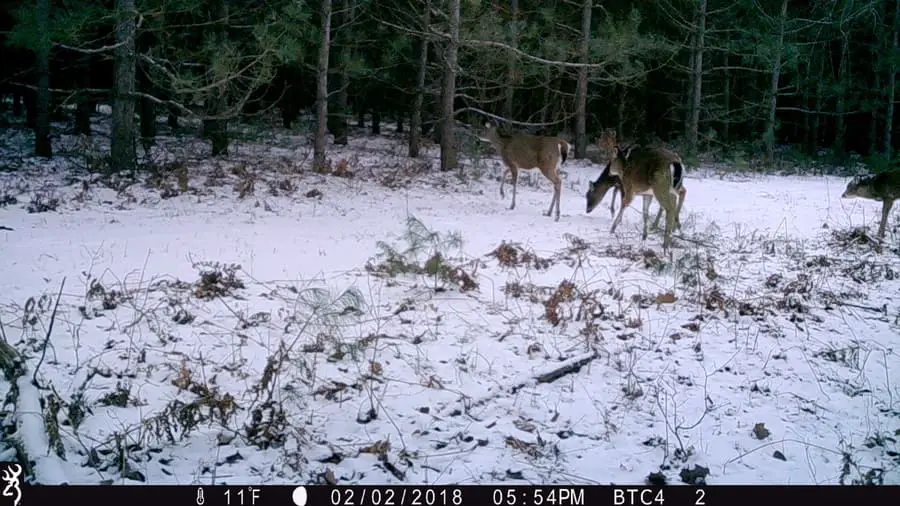
I like to begin by finding areas where deer congregate, or yard, together. This is often this easiest place to get the most inventory of your deer. Places like cedar swamps, young conifer stands, and south facing ridges are great places to find deer during the snowy months. They tend to bed in large groups, using their strength in numbers to survive the harshest parts of winter.
Other great locations to find large numbers of deer are along crop field edges, and the bottom of draws near oak flats where uneaten acorns tend to collect. Deer tend to stick close to easy access to food sources during the winter, ensuring they do not need to burn much energy in order to gain the energy that food would provide.
The length in which you leave your cameras out, is not nearly as important as the amount of deer you are able to capture with your trail camera. Obviously, the longer you let your camera soak, the more information you will be able to have, and the more accurate the results will be. I recommend at least running a trail camera survey for a month. This will give you the ability to not only capture most of the deer that frequent your camera location but will allow time for deer outside the area to happen to wander through.
Trail Camera Settings
Once you find a prime location for deer activity, there is no special way to hang your camera. Just find a location that has great potential for deer movement and hang a camera.
The camera settings can be a bit more complicated. When conducting surveys, I prefer to use short video modes, around 15 second clips, with a 2 minute delay. The reason for this is when a large number of deer move in front of your camera, with regular still photography you tend to lose track of which doe was which. You are never sure if one doe moved out of the screen, and another doe slipped in. It can become very complicated to count deer, when you are not sure which deer you have counted.
Having a video allows you to see the deer actually move in and out of the camera view. In this scenario when a large group of deer walks by you can count them like sheep jumping over a fence. The reason I use the shorter video is simply because watching 300 clips of a minute long video becomes tiresome. The general idea of getting a ratio of doe to fawns is not necessary to see every deer, but rather to get as many as you can, and get an accurate count.
Recording and Interpreting Information
We now have a plan for a fawn recruitment survey. We have locations pinpointed, camera settings are optimized for our specific situation, and now it is time to record and understand the information that our trail cameras are giving us.
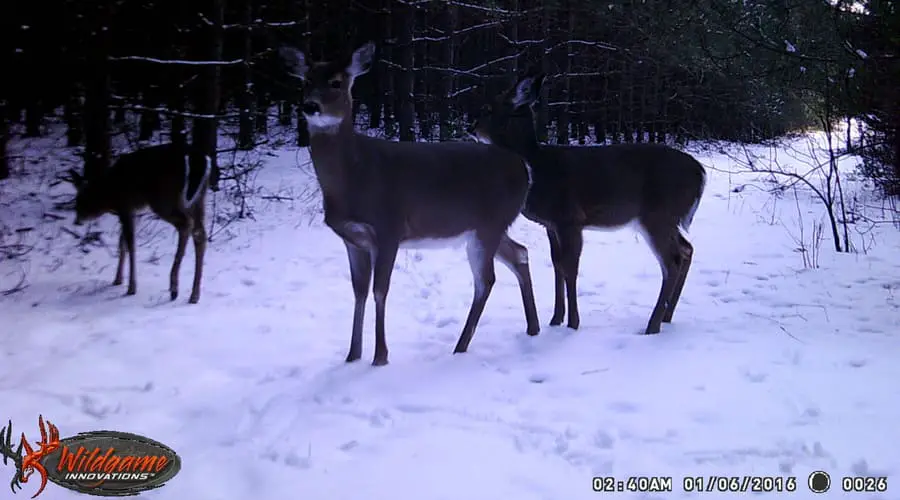
The first step is to count every doe and fawn. There doesn’t need to be an elaborate spreadsheet documenting every deer that walks by your camera, a simple tally sheet will work fine for this. Take an accurate count of each doe in one column and each fawn in another.
At this point in the year, it is obvious that fawns no longer have their distinguishing spotted coat, and are are a little more tricky to decipher. The overall size, the shortness of the snout and the lack of girth of the body are all telling signs of a fawn. The more you practice, and the more deer you look at, the easier it will become to separate the fawns from a breeding age doe.
Once you have your count tallied, the information is a great starting point for understanding a hunting property. It is noted that a healthy breeding population will have a ratio of 1 mature doe, to every first year fawn. This is simply and estimation of a healthy ratio, and there is no need for concern if it is slightly higher or lower.
If the doe to fawn ratio is closer to .5 does to every 1 fawn, the ratio is too low. This will have a negative affect on the amount of bred does that will likely give birth to fawns the following year. While it is important to know that first year fawns are physically able to breed, they typically will not breed until the second estrus cycle, in most cases late December. There is a ton of scientific research on the viability of breeding fawns, but just note that the success rate of them being able to recruit a fawn the next year is dramatically decreased. If you factor in the potential winter kill off, the fawn predation in the spring, and hunter harvest numbers, essentially the deer herd size in your area will likely decrease.
If you find your survey is showing the doe to fawn ratio to be higher than 1.5 mature doe to 1 fawn, you may find your self having a surplus in deer in your area. Given there is adequate food supply, and habitat to survive the winter, there will be more fawns recruited in the next year.
All of this information is simply the building blocks of your understanding of the deer herd in your area. There are many factors that will attribute to this information throughout the year, including a deer density survey that you should perform in your summer trail camera strategy, and the buck to doe ratio that you should observe through your Fall trail camera strategy. Having all of the information will allow you to determine the amount of does that need to be harvested, the impact predation has on the spring fawns, and if your property can support an increase or decrease in herd size.
Buck Inventory
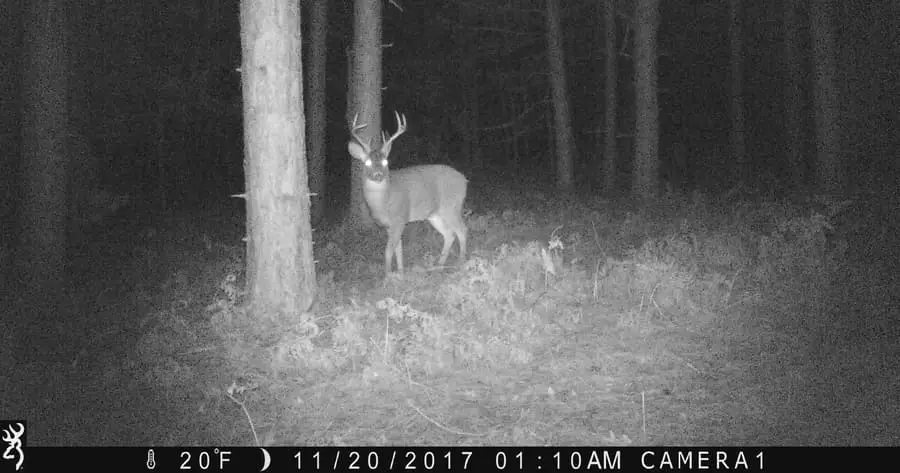
Now that the hunting season is officially over, you might be looking for any sign that the monster buck you were never able to place you tag on has survived. Or maybe, just as important, how many of the deer you were hoping to see next year, made it through the gauntlet of deer hunting. The early winter is the best time to try and take an inventory of the remaining bucks on your property.
It is important to get your trail cameras focused on buck inventory immediately after the hunting season. Depending on the deer, the intensity of the rut, and the severity of the winter, bucks may begin to drop their antlers in late December, making it very difficult to identify them. Once they do so, they will likely begin to yard with does, fawns and other bucks, making the process of identifying them even harder. Some buck however may hold on to their antlers into March, but these factors are extremely difficult to predict, so taking an inventory of surviving buck early in the Winter will assure that you will be able to get the best information you can.
In finding bucks during the winter season, the most important aspect is the location of your trail cameras. You will have to dig deep to understand your hunting property, and also comprehend the mindset of buck.
Rut Activity
First of all, always keep some of your cameras in high rut locations. Saddles benches, pinch points, down wind edges of doe bedding areas, and any other places you would often catch a cruising buck during the rut. These cameras, are likely to show very little activity, but deer have two objectives in life; stay alive and breed to pass down their genetics. If there is a buck with any inclination that there might still be a doe willing to breed, that buck will be on his feet in search of her. There will always be a second estrus cycle, and in some areas a third or fourth. While the deer movement is much less intense than that early November time period, bucks will cruise those same locations looking to breed. Keep your cameras there and capitalize on it.
Trail Camera Settings
Most of these situations will call for a more dynamic setup. Deer will be on the move, having a destination they are focused on. These type of set ups are likely the most challenging for any trail camera user. In these areas, I often place my best trail cameras. The ones with the fastest trigger speeds, the shortest recovery times, and the greatest amount of detection zone. This allows you to get photos of those bucks that are moving at a faster pace.
Since they move at such a quicker rate, I wont bother with settings other than straight images. Videos, and hybrid modes often have a slower trigger time than photo modes, and taking a chance on missing a sighting of a buck at this point is not worth trying to play around with different modes. You can however increase the amount of photos that your camera will take. During most of the year I will set the burst to 3-4 pictures, but during the winter, when there will be less travel in these areas, there is no need to try and save space on your SD card. Setting the burst to 5 or even 6 photos makes a lot of sense.
Scrapes
Another great location is around scrapes. Often times during November into early December scrape lines begin to dry up. Bucks tend to already be locked down with does, or have moved out of the area in search of new breeding opportunities. Once the first rut is over, and deer begin to settle back into normal routines, often times some of the more prominent scrapes will open back up. While most of the territorial scrapes that pop up unexpectedly during November will not be touched again, those big community scrapes located near bedding and feeding sites, are usually at least checked.
The rule of thumb that I use, is if a scrape is made in connection with a licking branch, and a rub, it is more often than not revisited at least once during the post rut activity. Deer often use licking branches as an indicator of other deer in the area. Even if the scrape is still covered in snow, or leaves, deer will come by and use the licking branch for a way to identify other deer in the area.
Trail Camera Settings
Setting cameras around scrapes can be a lot more fun. Most of these types of setups are more static, meaning you know for the most part which direction the deer will enter the scrape from, and you know it will stay around for a few moments at least.
In these situations I always use a hybrid mode on my trail camera. The hybrid mode will initially take a photo once the deer steps into your detection zone, and then will follow up with a video. There is simply nothing more entertaining than a video of a buck working a scrape. With a video it will allow you to see many angles of the buck as he turns and works the scrape and licking branch. It also gives you an opportunity to decipher the dominance of a particular buck, based on his aggression while working the scrape.
Bedding and Food
It is no secret that the rut takes a physical toll on a buck. Weeks of running and chasing, lack of sleep, and a general disregard for food, will wear even the most healthy deer down. Once the rut is over, their number one objective is to take in calories and pack on fat before the heavy winter strikes.
For this reason alone, placing cameras near food sources is possibly the most effective way to gain knowledge of the bucks who have survived in your area. They seek high protein and high fat content, to regenerate what they had lost during the rut. Grains, such as unpicked soybeans and winter wheat are a huge attractant for bucks at this time of the year. Natural browse such as honey suckle pods, arrow head plants and left over acorns are well sought after as well.
Deer, and bucks in particular, do not want to travel very far to eat at this point in the year. They need to reserve all of their nutrients, and traveling great distances to feed will burn most of calorie intakes. So, finding bedding areas closely adjacent to high protein food sources is the winning combination for finding those worn out bucks.
Trail Camera Settings
If you can find those ideal spots of transition between food and bedding, you are in a great position. The only problem that you will encounter is the tight corridors it produces. Running cameras on those transition lines, means you will have to set your camera and then stay out. Most often bucks will bed within visible sight of the food source. They may tolerate being bumped from their beds once or twice, but a continuous parade back and forth to your camera is going to relocate that buck permanently.
As for your trail camera settings, it is a great time to play around and find out what you like the most. Deer wont be cruising back and forth, and will still be slightly cautions of their movement into open fields. This gives you the opportunity to play around with many options from video, and hybrid modes, to photo bursts and megapixel settings. Just be sure, if you have the opportunity, to use cameras with a black flash. The last thing you want is to spook deer coming right out of their bedding area.
If you are determined to set you camera up on an open field, such as a picked corn field, your best option is use your timelapse mode. Setting your camera to take pictures for an hour before sunset and an hour after sun rise, will allow you to get a really good view of the deer that pile into their fields at night.
Shed Season
Not only is finding bucks for your inventory critical during the winter months, but once you find those bucks, and begin to regularly get photos of them, it will give you a leg up on finding sheds in the early spring. Getting routine pictures of a buck with both antlers, during the time of year when shedding antlers is most common, will allow you to pinpoint their bedding and feeding locations. Both are the most common places deer will drop their antlers.
While there are no specific trail camera tactics that will help you find more shed antlers, knowing a buck’s location during the winter months can help you focus the search.
Deer Health
While finding bucks, and taking fawn recruitment surveys are important to your overall plan as a hunter and land manager, there is is truly nothing more important than the health of individual deer, and the overall health of a deer herd.
South Dakota State University conducted a study to determine the reason for why bucks in the Eastern part of the state, had larger mass, and bigger antlers than those whitetail deer from the Black Hills region. Through years of this conducted study, they came to the conclusion that the deer from the Eastern part of the state, didn’t have better genetics, and their size had nothing to do with the rich nutrient farm land they were feeding on since birth. Everything about the deer’s ability to reach maximum potential had do deal with how stressed the mother was during pregnancy. (This one paragraph overview does this study no justice. Be sure to read these incredible findings here).
The point is that there is nothing more important to the overall health of a deer herd than the health they have during the winter months. With a trained eye, you can get an idea of the overall stress a deer is under from a few photos, and videos from your trail camera.
A few signs you can look for from a stressed deer:
- Visibly showing ribs
- Sluggish with movements
- Heavy panting
- Shedding coat during winter
When you begin to see these signs, you will have a better understanding of the needs of the deer herd in your area. If you own the property or have rights to manage it, creating a more winter focused food source and better winter habitat, should be in your plans. If this is public land, check to see if supplemental feeding is allowed, and providing deer with a high protein mineral lick or a pile of carrots to help supplement their feeding might be a welcome bonus. Whatever the solution is in your specific situation, using trail camera will help you identify the overall health of your deer herd.