
Has your trail camera ever taken pink photos? I had never heard of this, until a few years ago, I had a camera that started taking all of its daylight photos with a pink hue. I tried everything, from replacing batteries to updating firmware. Nothing helped, and I simply tossed the camera into a box and chucked it up to it being the end of the camera’s life span.
Little did I know that this is a somewhat common occurrence, that happens among all makes and models of trail cameras. The fix is simple, and the reason for the pink photos is something that flew under my radar for a number of years.
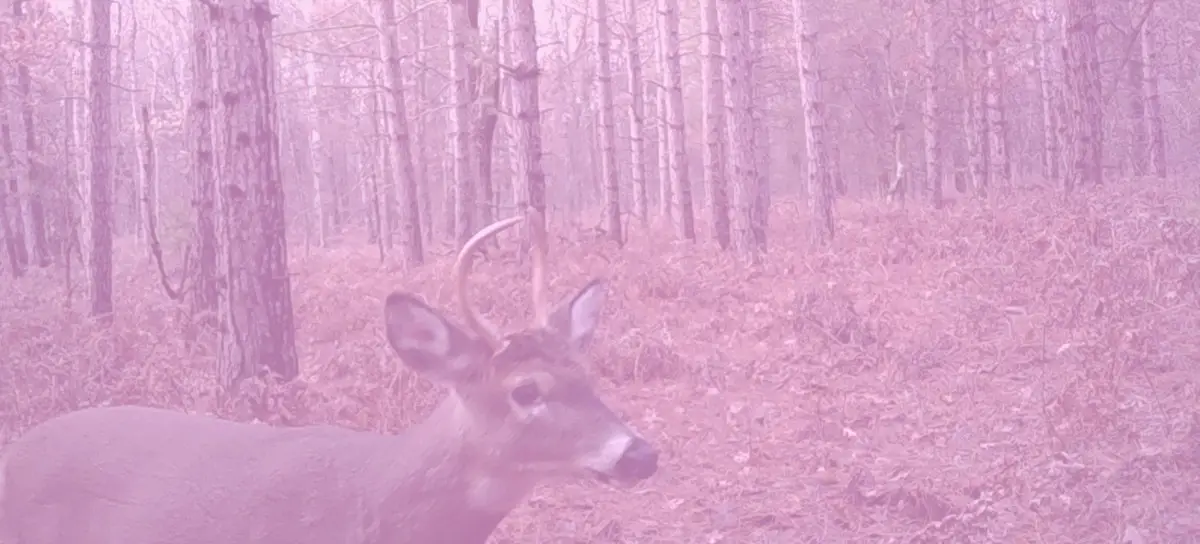
When a trail camera takes a photo that is pink, it is simply because the IR lens is stuck down, covering the camera lens during daytime photos.
What Causes Pink Photos
The Light Spectrum
When a trail camera takes a photo during day light hours, the image sensor on the back end of your camera, has the ability to see and imprint all of the colors of the rainbow. If you can remember from elementary school science class the colors in the spectrum are Red, orange, yellow, green, blue, indigo, and violet (ROY G BIV).
All of these colors produce a wave length of light that we can see. More importantly, they produce a wave length of light that the image sensor in your camera can see. When these wave lengths go through your trail camera’s lens they are able to easily be imprinted on the image sensor. The image sensor is ultimately is what collects the picture and then is loaded onto you SD card.
Artificial Lights
During night time photos, however, there is insufficient amount of light to take a picture, so trail camera manufactures supplement this lack of light with an artificial light, or flash.
When trail cameras first were equipped with flash technology for night time photos, a white flash was used. This flash allowed the cameras the ability to take full color photos during the night because white reflects all colors. The problem that was found is that the white flash would unequivocally spook animals because it was so visible.
In order to alleviate this problem cameras began being produced with what is known as infrared lights (IR). The issue with having an IR light, and now more commonly a no flash IR is that Infrared is a color that is not on the spectrum we are able to see. In fact it creates a light wave that is much larger than red, and red is the largest wave length we can see.
Manufacturers began to place a IR lens in front of the camera lens that allows the image sensor to see and record the infrared lights.
Why Your Photos are Pink
There is a light meter system on every camera that determines the amount of light that is in the area. This system relays the information to software on the back end of your camera, that is called exposure tables. These tables calculate the amount of light and adjusts the photos parameters for shutter speed, ISO (image sensor’s sensitivity to light) and artificial light, in order to create the correct exposure for the photo.
When the exposure table reads the information from the light meter, and determines that there is not enough light in the area, it activates the IR flash. When the flash is activated, in order for the image sensor to see the IR wave lengths, the software drops an IR lens in front of the camera lens.
The IR lens is a pink toned lens. When you are having issues with pink colored photos during day time pictures, it is simply because the IR lens is either stuck, or improperly engaged. The pink tone of the lens during day light is picked up by the image sensor and gives you a color similar to a photo filter you would find on Instagram.
Diagnosing the Problem
The most important aspect of diagnosing the problems with pink photos is to understand what time of day these photos are occurring. If you are receiving pink photos during that in between time of day and night, around dawn and dusk, but complete day time photos are coming out in full color, the issue you might be experiencing is that the light meter is reading the immediate area with less light then there truly is.
I often find that this happens when the camera is placed in a darker area, say under a canopy of conifers. The light meter is going to read what is directly around the camera, and if the camera is placed in a well shaded area, it is possible for that camera to engage the IR flash to accommodate for what it perceives to be lack of light.
How to Test It
Testing the camera is the easiest way to find out if the lens is stuck, or the light meter system is creating a glitch in the camera. Simple play your camera in a well lit area, such as your back yard, and walk back and forth in front of it. This way you can control the amount of light that is being read by the camera, and if the photos are still pink, there has become a problem with the IR lens.
How to fix it
Possibly the best way to fix a stuck IR filter is to turn the camera on and place it in a dark room with no windows, like a bathroom. Then flip the light on. This should shock the light meter system to remove the IR lens. The problem with this is that if there is a mechanical reason for it being stuck, the lens will still be stuck down.
If the dark room doesn’t fix the problem, there might be some debris preventing the lens from moving up. Take the palm of your hand, and give the camera a solid smack on the side of the housing. I know scientific right. Don’t beat the camera against a tree or a rock, just simply give it a solid smack. This should dislodge any debris that is preventing the IR lens from moving.
In the end, if neither of these options seem to be working, you will need to contact the manufacturer. They will be able to assist you in more trouble shooting, and ultimately will need to replace the mechanism on the IR lens.