
Sometimes trail cameras can be down right frustrating. Everything from not taking photos and batteries dying, to my most hated problem, the trail camera that simply wont turn on. The temper tantrums I have thrown while in the woods checking trail cameras, makes me glad that I am in the woods alone. Which bring me to another question: If a grown man screams and acts like a child in the woods, and no one is around to hear it, did he really throw a temper tantrum?
Before you enter into your inner toddler stage, take a step back and really contemplate why a trail camera will not turn on. Sometimes the answer is simpler than you think.
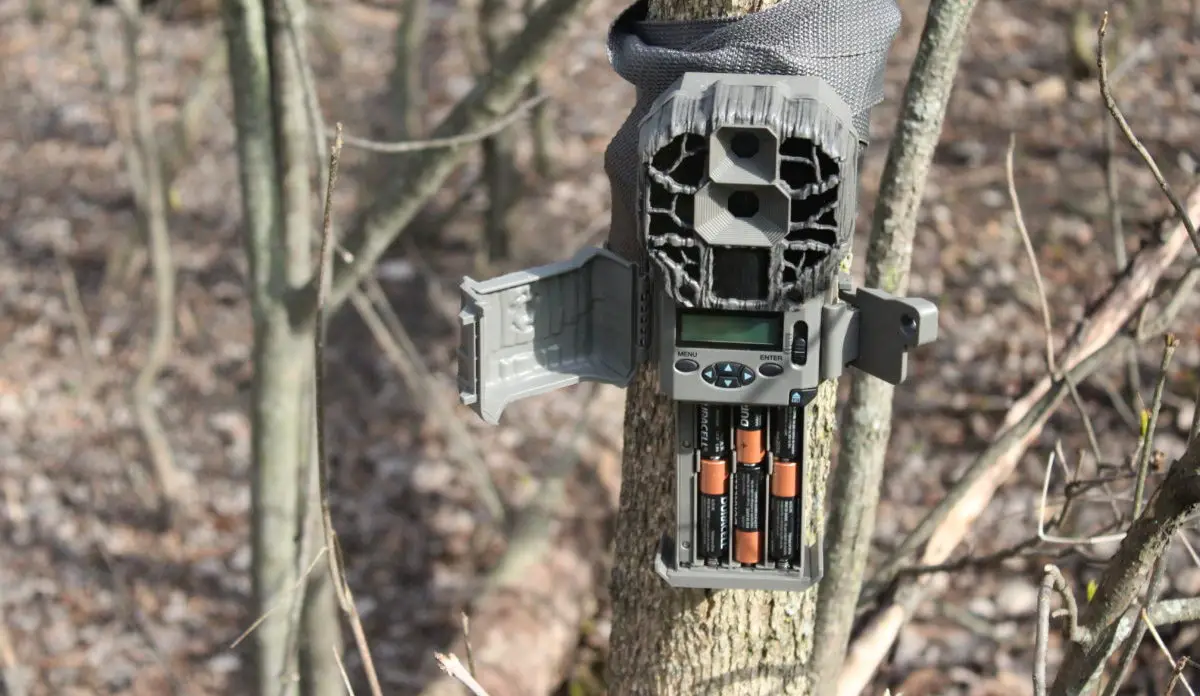
A trail camera that will not turn on is most often a problem with power supply, such as dead batteries, a corrosive battery, or even dirt an grime on the contact ports. Other possibilities could be water damage, faulty LCD screen, and human error.
I have experienced just about every problem when it comes to turning on trail cameras. Here is a list of things to check, how to fix, and what to do, before throwing your trail camera in the trash.
Make Sure Its Not Operator Error
Before you go into a deep trouble shooting worm hole, just simply take a step back and make sure that you are not the problem. This is hard, especially for me, to admit that all of my problems are in fact my problems not the trail camera’s, but it does happen. And it can be even more frustrating after 3 hours of messing with the camera, only to realize it was me to begin with.
On- Off
There seemingly is not much that you can do to affect whether a camera will turn on or not, but the one thing that has been a continuous problem for myself is on certain models, such as Bushnell, Covert and Exodus, that have a toggle switch for the power.
These toggle switches have three options: On, Off, Setup. When I am setting up my trail camera the switch is pushed all the way to the right. Once I have my settings where I want them, I have moved the switch all the way to the left, in the “on” position.
The problem with this immediate move is that it passes the “off” position, and similar to when you ask your computer to do too many things at once, the camera is being asked to be off and on at the same time. This sometimes causes the camera to just stay off.
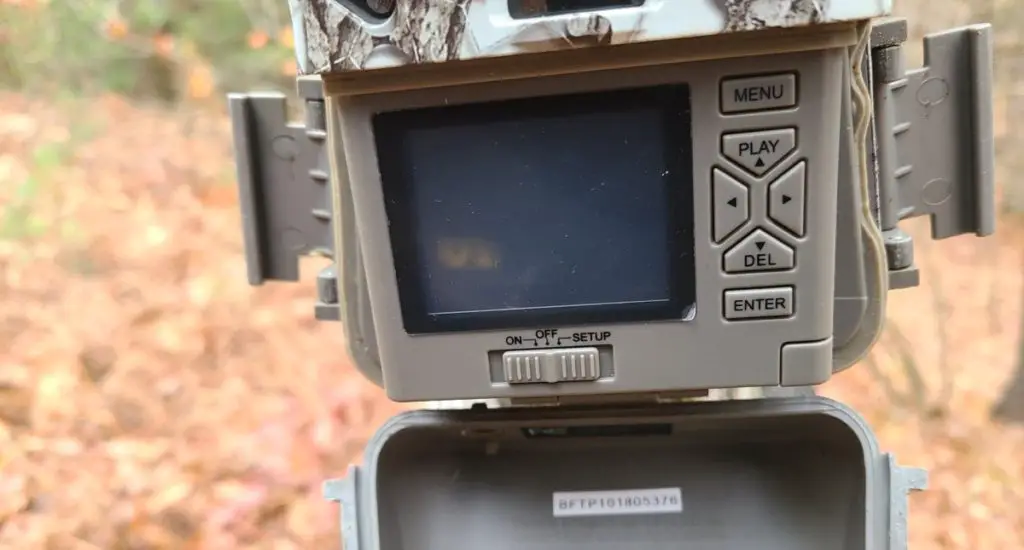
In the case of myself, I immediately start toggling the switch back and forth like a light switch trying to get the camera to turn on. Trust me don’t do this, it makes things worse. Simply turn the camera to “off” wait 15-20 seconds to allow the camera to properly turn itself off, then turn the camera back on. If this was in fact an operator error, the camera will turn back on.
It is good practice moving forward, on these type of cameras, to always turn the camera off between the setup and on switch. Allowing it to shut down for 15-20 seconds can eliminate this operator error.
SD Card
One last thing to check to assure you are not the problem is to make sure there is an SD card in the camera. Most cameras will give you a warning that there is no SD card in the camera, but I have run into a few of the cheaper white label cameras that simply do not turn on. Its a quick check, but sometimes easily missed.
Check For Water Damage
Once you rule out the possibility of operator error, simply do a quick check to make sure that there is no possible water damage. Electronics and water do not get along. Who knew, right?
Simply do a physical check of the camera to make sure that all the seals are in place, and are not damaged. The rubber seal around the housing door, and the rubber plug on the DC output at the bottom of the camera are typically your two biggest culprits.
Also, check to make sure there is no moisture build up inside the housing, and assure that all of the screws in the back of the camera are in place. The key is to identify if any moisture has gotten into the camera. This should take less than 30 seconds to check all the possibilities, but a quick surveillance will save you time trouble shooting everything else.
If you conclude that you do have any sort of moisture inside the camera, the best thing you can do is remove the batteries and SD card and place the camera in a sealed container. A gallon size zip lock bag, or a Tupperware container, works well, and place a few silica packets inside with it.
Silica packets, in my opinion work more efficiently than simply trying to use rice to draw out moisture. A silica packet can absorb up to 40% of its weight, so using a few inside a sealed container, should be able to draw out the excess moisture inside the camera.
Check Batteries
The next step in identifying the problem comes down to the power source. This is not only the most likely problem, but can also be one of the more time consuming problems to diagnose.
Make Sure Batteries Are In Correctly
If you run multiple types of trail cameras, placing the batteries in the wrong direction can be an easy mistake to make. In some cameras, all the batteries face the same direction, in others, you need to alternate them. If you were in a hurry setting up your camera, it is quite possible that you slipped a battery, or even half of the batteries in the wrong direction.
Just make sure the positive is connected to the positive side, and the negative to the negative.
Change Batteries
The next thing you will want to do, is simply change the batteries out with all new ones. Even if you just put in a fresh set of batteries, it is possible that one of the batteries is faulty, creating the entire circuit to be interrupted.
Replacing all of the batteries at once, will eliminated changing out each battery one at a time, in hopes of finding the one bad battery.
I have read on multiple occasions that if one battery in a new pack is bad, then it will ruin all of the other batteries. While there is some evidence that this could happen with Alkaline batteries, this is a myth if you are using lithium ion. So, there is no need to buy an entire new pack of batteries, if you conclude that one is bad.
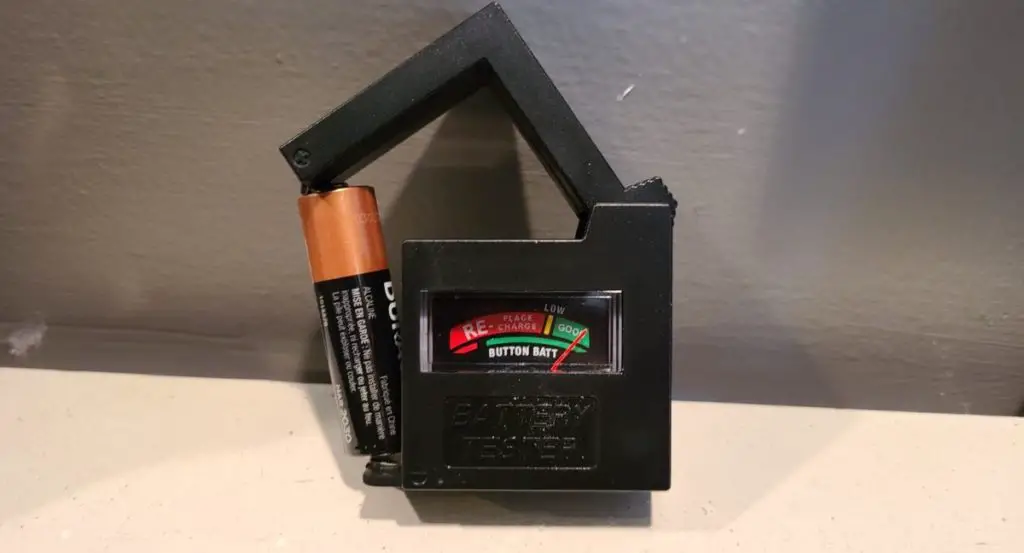
Test Batteries
At this point, if your trail camera still does not turn on, you need to make sure that your batteries have power. This is an important step that is often over looked. If the batteries do in fact have power, then you know that you need to look farther down the line to located the power issue.
To test batteries, simply use a battery tester on each individual battery. These battery testers can be found fairly cheap, for under $10 on Amazon. I carry one in my trail camera pack at all times. You never know when you might need it.
Each battery you test should read 1.6v or higher. If you have a battery that is testing less than 1.6v then replace it and try to turn the camera on again. If all of your batteries are testing fine, it is time to look for possible corrosion on the connection ports.
Check For Corrosion
Now that you have confirmed that all of your batteries are producing 1.6v or more, it is time to kick the can down the road and move to all of the contact points. Especially with trail cameras that are constantly in the field, where dirt and debris can work its way into every possible nook and cranny, sometimes the connection ports become dirty or corroded.
This fix is simple, but most likely will not be done in the field. Simply take out the batteries, and using a Q-tip and vinegar clean each and every contact point, both positive and negative.
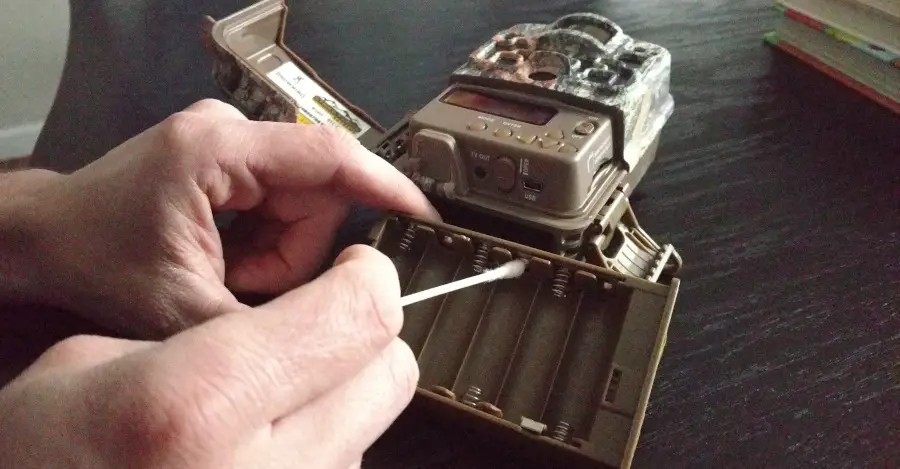
If your trail camera has a battery tray, make sure you apply the vinegar onto the ports of the tray and inside the camera where the ports connect to the trail camera as well.
Allow the vinegar to dry, typically this will take 5-10 minutes, and then place the batteries back into the camera and try to turn it on again.
LCD Screen Problems
If from what you are able to decipher, it does not seem to be a problem with the power source, the next logical explanation is the there is a problem with the LCD screen on the camera. Like all other forms of electronic devices, sometimes the screen actually does go out.
The nice thing about an LCD problem is that it is easy to check, the bad part is that as a regular consumer, without the technical expertise of the electronic workings, there is not much you can do about it on your own.
To make sure that the LCD screen is not the issue, simply turn the trail camera on and walk back and forth in front of it for a few minutes. Just because the screen is not showing, does not mean the camera is not working.
After a few minutes, turn the camera off, and check the SD card to see if it took any pictures. If there are pictures of you walking back and forth, the problem is indeed the LCD screen.
Contact Manufacturer
When all else fails, call the manufacturer directly. Do not email them. The simple reason for this is because in my experience, talking directly to a customer service representative can resolve the issue much faster than exchanging a handful of emails over a couple of days.
The customer service department, has likely dealt with the same type of problems that you are experiencing, and are equipped to give you step by step advice on how to resolve the issue.
Conclusion
While having a trail camera not turn on can be a frustrating problem to have, it is important to take a step back and follow the proper trouble shooting steps. Often times the problem comes down to one of two things: a power source problem, or an operator’s error.
From my experience, both of these issues can be identified and remedied on your own. If the problem persists, however, never hesitate to contact the manufacturer, most trail cameras have a manufacturer warranty, and the longer you wait to contact them, the more risk you take that the warranty will expire.