
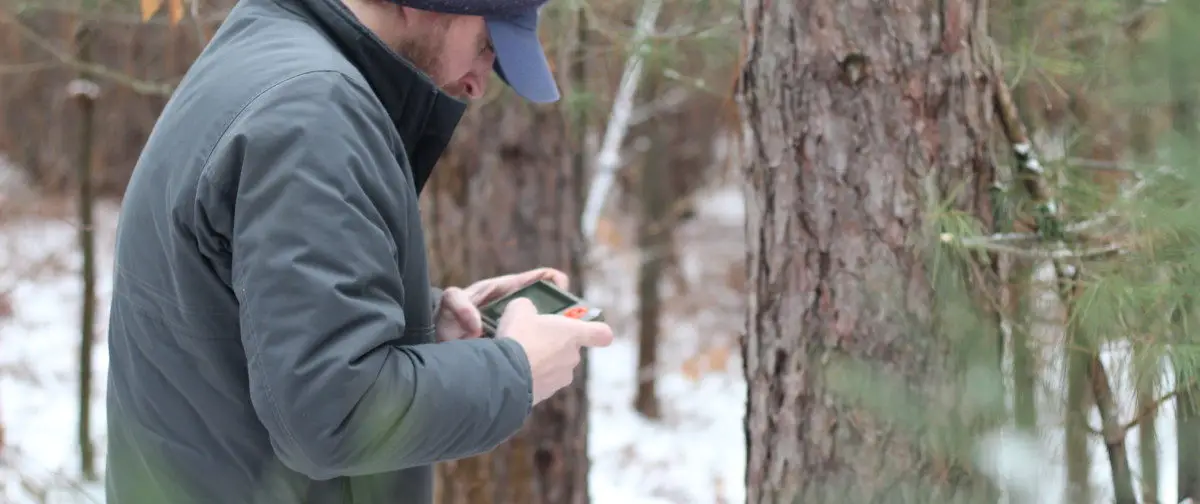
When running trail cameras there is so much to think about from where to place the camera, to keeping it out of sight of potential thieves. How to view save and delete your trail camera photos are the farthest thing from your mind until a problem occurs, then they are seemingly the most vital aspect of running your trail cameras.
The most important part of trail cameras is to have a good practice on how to use, store, and organize your SD cards. The SD card is the life blood of your ability to view photos, and without solid management of your storage, you can find yourself in the midst of a lot of frustration.
Good SD Card Practice
Lets face it, taking care of your memory card isn’t exactly rocket science. But before you get around to checking out your latest trail camera photos there are a few simple things that you should make sure you do, to keep your SD cards in good working order, and free of corruption. The four most basic principles of having good SD card practice are:
- Choose Quality SD Cards
- Format Your Cards In Your Trail Camera
- Label Your SD Cards
- Protect Your SD Cards
Choose Quality SD Cards
Believe it or not, all SD cards are not built the same, and as the saying goes you get what you pay for. Stick to reputable brands, we recommend using San Disk or PNY SD cards. Over the years we have encountered far less problems with these brands than we have any other.
You can find really good deals on SD cards from Amazon, just make sure that you are buying your cards directly from the certified seller. There are a lot of knock off brands and dealers on Amazon that create and sell products that are not up to standard. Choose name brand cards with reputable dealers, and in the long run you will be much happier with the performance. If you are not sure which SD card you should buy to fit your needs, check out our article on choosing the right SD card for your trail camera.
Make sure when you are buying your memory cards that you always purchase two cards for every trail camera. This way you will always have one card in your camera, and the ability to switch cards out when you are in the field.
Format Your Cards In Your Trail Camera
Now that you have purchased high quality SD cards, format your cards inside the trail camera you will be using them in. By formatting your card inside the device it allows the camera to arrange the file structure to work best with its code. It will set up files specific to your camera, making the uploading of photos and video a much smoother process.
Label Your SD Cards
The very first thing that I always recommend is to label you trail camera. With a black sharpie marker, I write a number on the inside of the housing door. This way, when you are in the field, there is no mistaking which trail camera is what.
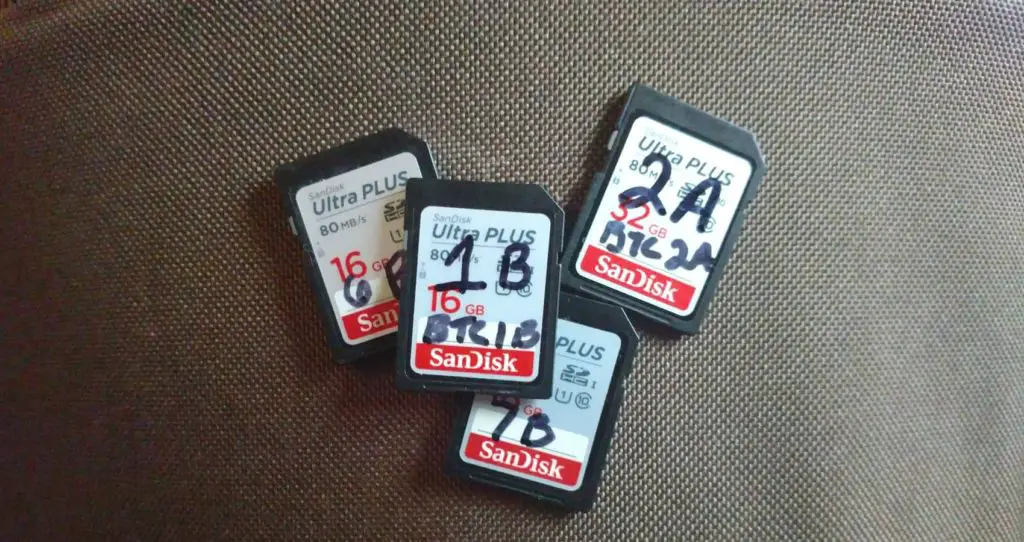
Consequently, I also label the two SD cards that have been formatted to that camera with the same number. This way, I always know which SD card will go to which trail camera. Its like having a match set. For example if the trail camera has been labeled #3 I will have one SD Card labeled 3A and the other 3B.
Doing this allows for you to not only stay organized, but when an SD card begins to act up, and eventually they all will, you will know exactly which card needs to be replaced.
Most importantly, having SD cards designated for specific cameras, prevents the cards from picking up files and dropping them onto the firmware of another trail camera. When you interchange SD cards between different cameras, accidentally exporting files from one camera to another, happens more often than most people realize. In doing so, you run the risk of corrupting firmware, that is created specifically to that trail camera’s functions. All of which is easily avoided by simply having designated cards for each camera.
Protect Your SD Cards
This should go without saying, but you do not want your memory cards to get damaged. Throwing your cards in the bottom of your pack and allowing them to potentially get scratched and pick up dust particles will quickly have a negative outcome. When the metal contacts on the back of an SD card collect dust or become scratched it will give you a poor connection to the contacts within the trail camera. This can and will lead to card failure.
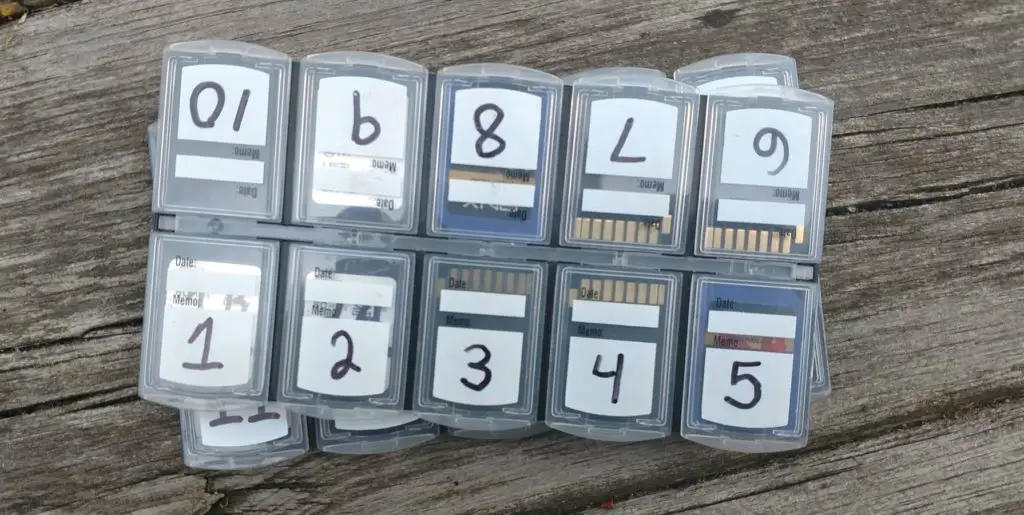
Buy a protective case for your SD cards. It doesn’t have to be an expensive elaborate foam filled case, in fact we simply use these cheap cases from Amazon. It holds 10 cards, they are small enough to slip into your pocket, and you can label each place for every card you have. It keeps things organized and protects your card.
Other Good Practices
- Switch camera off before removing SD Cards- Trail cameras are heat and motion activated, therefore when you are changing SD cards it is likely that your camera is taking a photo of you. Make sure you always turn your camera off and wait a minute before removing the SD card. If you take the card out before it has finished writing the picture it is currently taking, you run the risk of loosing photos that are already written onto the card
- Update Firmware- Once a year check to see if your trail camera manufacturer has released a firmware update on your camera. Not only is this good trail camera practice to ensure your camera is working properly, the firmware update might also involve how the camera writes files to your memory card.
- Avoid Filling your SD Card to Capacity- It is difficult to know how many photos your trail camera will take in a given time period, but with that said try not to allow your memory card to fill up completely. Similar to your computer, you do not want to use every bit of hard drive space, because it begins to affect the overall performance of your computer, the same principle occurs with SD cards.
Correct Ways to View Photos
Never View Photos On a Digital Camera
First of all, never use a digital camera to view your trail camera pictures. I had done this for a number of years, before I was made aware of the problems that doing this may cause. In general, the use of a digital camera, one that you would would take on family vacations, to view trail camera photos, has the potential to lock your SD card. The technical aspect of how or why this happens is deeper into the software of the two devices. But just know that more often than not the two devices are not compatible. Using a digital camera to view your trail camera pictures could lock you out of weeks of information, and corrupt you SD Card.
Card Reader
One of the most secure ways to view your trail camera photos is by using an SD card reader. If you choose this way however, do not go super cheap. I have seen way too many memory card become corrupted by a cheap, poorly constructed card reader. The card reader we have been using most often is the Stealth SD card reader.
It is important to know that some SD card readers will create an extra file on you SD card for thumbnail photos. If you use your card reader in the field to check photos, and then later plug your card into your computer you could have an extra file for thumbnails. Having an extra file of thumbnails does not cause any problems with the SD card itself, it is typically just a way for your SD card reader to compress files to match the resolution available to view photos. Just be sure to format your card the next time you put it in your camera, in order to delete this file correctly.
Computer
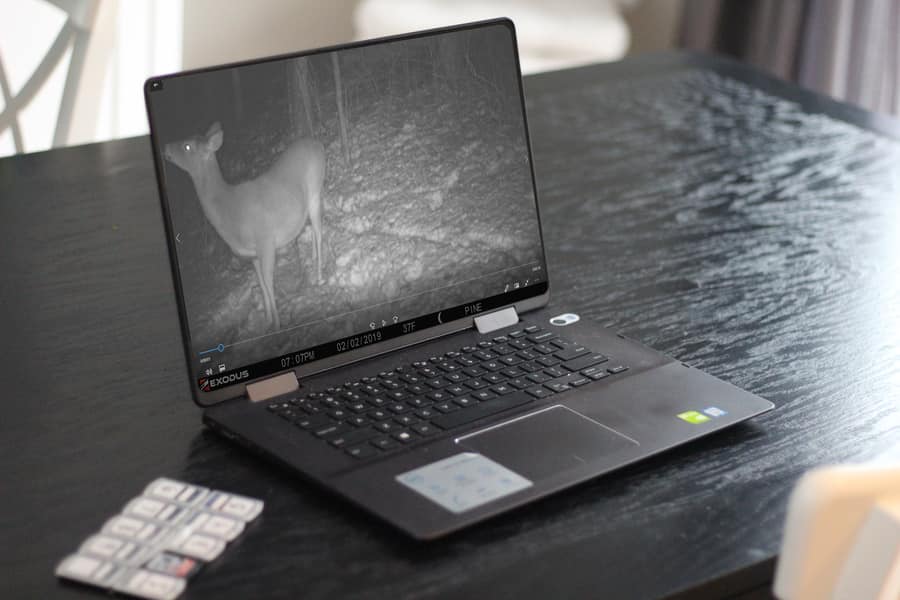
Most trail camera users have transitioned to simply using their laptop or desktop computer to view photos. Just simply plug your card into the SD slot on your computer and use the already installed media player to watch your trail camera video or look through photos.
Not only is this probably the safest way to view your photos, it has the added convenience of being able to save the photos and video you want to keep immediately while you view them.
Remove your card safely
If you do use your computer to view your trail camera photos, be sure to safely eject your SD card before removing it. This will assure you the SD card is not working, when you take it out, preventing failure and corruption on your card.
On the camera
There are many cameras on the market today that have a view finder built into the camera itself. The view finder not only helps will aligning your camera to face in the exact direction you would like, but also gives you the added benefit of being able to view your photos directly on the camera itself through a playback option in the menu.
These view finders are typically less than 3″ and are not going to give you full resolution photos, but do however give you a quick view if you are in a bind.
How to Save Photos
Transferring and saving photos to your computer is one of the more important aspects of running trail cameras. If done incorrectly you could lose all of your collected data, and even worse, corrupt your SD card. It is a simple process however, and when done correctly it is a quick and safe transaction.
Import to computer
Depending on the make and model of your computer, when you plug your SD card into your computer, you may see a popup window that says “import to computer.” This window will give you a few options, including view and import.
In this instance you can check the box to import and all of the contents of the SD card will be copied to your computer. When doing this though, it may give you an option to delete all photos once transferred. Do not select this option. You never want to delete photos on your memory card from your computer, we will cover this in a moment.
Automatically importing your SD contents to your computer is a quick and save way to upload entire folders to your computer. When it is finished, be sure to safely eject your SD card before removing it from your computer.
Manually
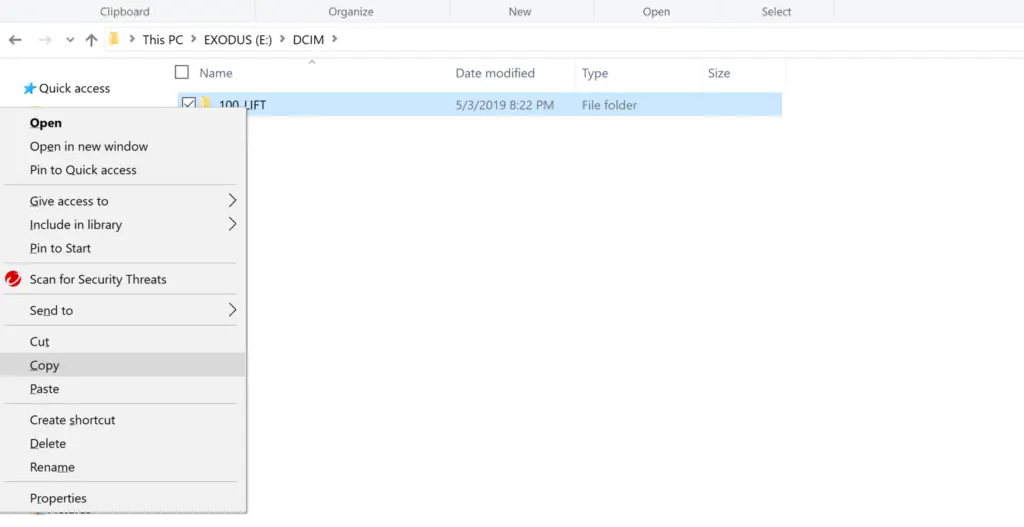
If your computer does not have an automatic import to computer option (mine does not) you can always do it manually. Simply go to your file folder on your computer and click on the SD card. This is typically in the (E) drive, but different computers may use different drives to locate external SD cards.
In most cases you will have a DCIM folder under the drive your SD card is located in. Right click on your mouse and select copy. This action copies your folder to the dashboard of your computer, and then you are able to go directly to your desktop, and right click on your mouse again and select paste. This is the proper way to copy your entire memory card to your computer.
ALWAYS use the copy and paste method. Do not get into the habit of clicking the folder and dragging it to your desktop. While in the end this does essentially the same thing, I have had an issue before where the file began to transfer and I had a computer error that did not allow me to transfer the file. This left the file, and all of its contents in limbo between the SD card and the desktop, and ultimately I lost all of the file contents. When you copy and paste, you have all of your contents in tact on the SD card, you have a copy on your dashboard and you have the uploading files going to your desktop. It is a simple thing, but in the end gives you a backup in the event that something does happen.
Once your files are on your computer you can do with them what you please. You can delete them, organize your trail camera photos into separate files or you can leave the file intact.
Individual Pictures
If you do not want to clutter your desktop and your hard drive with thousands of pictures from an entire file, you do have the option of transferring individual photos as well. You merely go through the same process of copy and pasting each individual photo.
If you have a few photos in sequence that you would like to save, you have the option of using your mouse and left clicking and dragging a highlighted box over the photos you want to keep. This way you can copy and paste your photos in a group rather than doing each one individually.
How to Delete photos
Deleting photos is where most trail camera users create problems with their SD cards. They have the photos they want and with the rest of them they simply just start clicking Delete, Delete, Delete. In most cases simply deleting photos on your SD card does no harm to the card, but that is simply most cases. If you do it enough, you will eventually run into a problem with your SD card retaining files, photos and inadvertently transferring firmware.
Deleting SD Cards
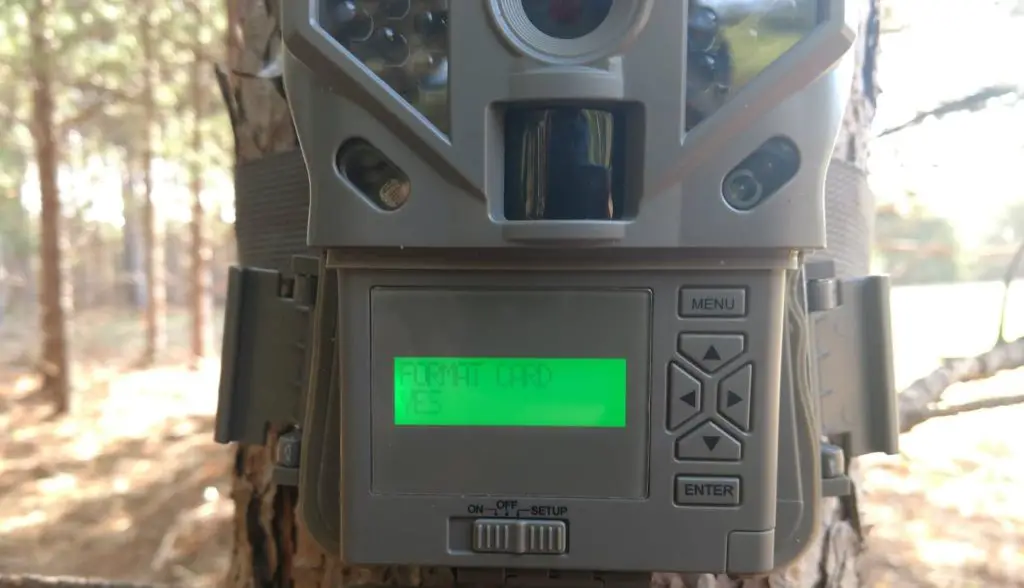
The best practice for deleting photos and files from SD cards, is to not delete them at all. Leave them on the card until the next time you go to use the SD card again. At that point, plug your card into your camera and Format the card directly through the camera. All trail cameras have this function through their menu options. (Do not format your card in your computer).
This essentially resets your card. It deletes all the photos that you have already saved to your computer, it formats files specific to your camera, and it ensures there are no inadvertently transferred files to from your computer. It essentially resets your card to its original state, the exact way it was when you originally formatted it to your camera.
Get into the habit of formatting your card each and every time you switch out cards. It is the healthiest way to ensure your card is in working order, and increases its longevity.
From Your Computer
Deleting photos that are already saved onto your computer is quite different than deleting them from an SD card. Essentially you can do whatever you would like with these photos. You can drag and drop them into your recycling bin, or highlight them and press delete.
In Conclusion
Viewing, saving and deleting trail camera photos is not a difficult skill to master. Just simply get in the habit of following the basic procedures:
- Buy Quality SD cards
- Format the cards in the camera they will be used in
- Label your cards and your camera
- Protect your SD cards
- Use your computer or a card reader to view photos, never use a digital camera
- Import photos or copy and paste, do not drag and drop
- never delete your SD card from your computer, always format the card inside your trail camera to delete photos.
Once these basics become a habit each and every time you use you camera, you will see that your SD cards will last longer and you will have less problems with card errors.