

Using your trail camera in video mode can be more effective than simply taking still photos. You learn more information, you can record sounds, and you get to see them for an entire clip, rather than your basic 3 shot photo burst. The biggest problem most people have with video is they enjoy having the single photo, to share with others, print out, or save as a screen saver on their computer. With today’s technology it has never been so easy to extract a photo from a video, allowing you to have the best of both worlds.
If you are new to using video mode, we have created the most comprehensive guide to everything you need to know about using video mode on your trail camera. It will give you an understanding of resolution, battery consumption, SD cards, and much more. It is worth checking out.
The easiest way to Save a photo from a video is by using the snipping tool on your windows operating system or the Grab tool with a Mac operating system. Despite the age or model of your computer, we will explore multiple options to get you the same results.
Windows Operating Systems
Windows Media Player
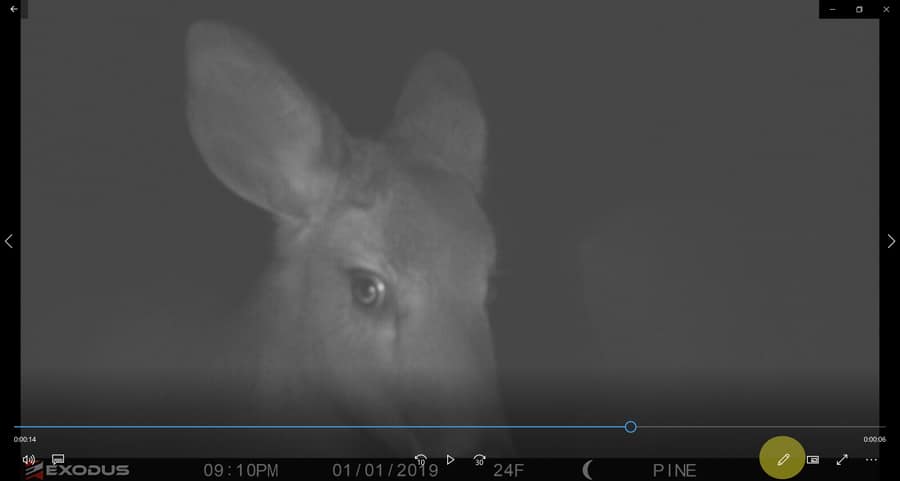
Saving your photo using the video software on your computer is an easy way to capture a still photo from your trail camera video. Simply open the video in which you would like to extract a photo from. Pause the video and manually use the slide bar at the bottom of the video to find the frame you wish to save as a photo.
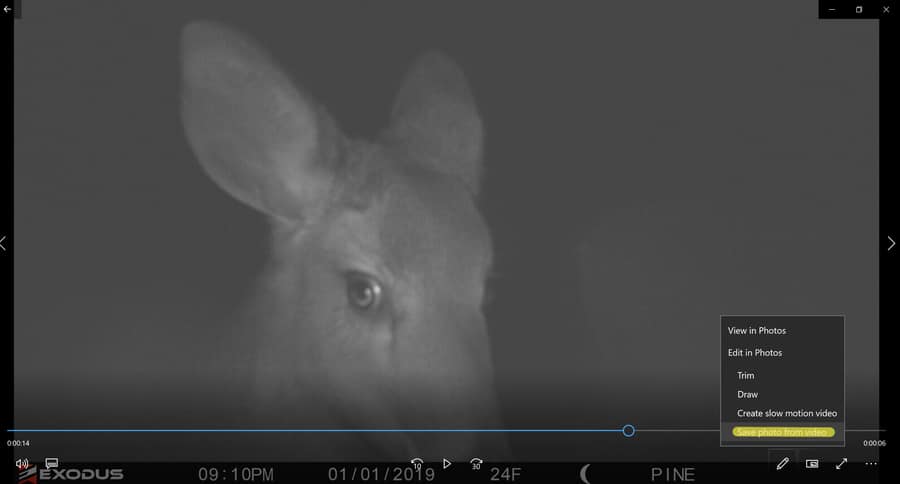
At the bottom of the screen there is a small icon that looks like a pencil. When you hover over your mouse over it, it will read “Edit in Photo.”
When you click on it, it will pull up a menu bar, and left click on your mouse the option that says “Save photo from video.”
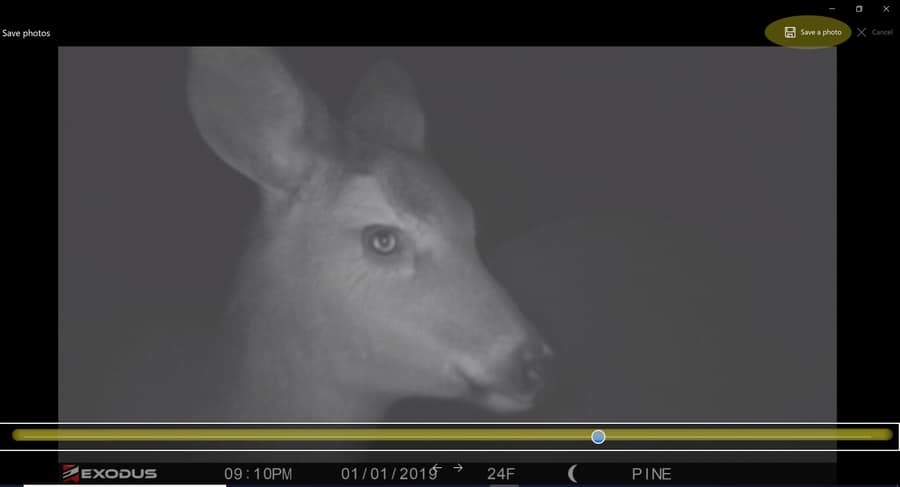
At this point the computer will bring you to a screen that looks very similar to the video player. This gives you the option to move through the video using the video play bar at the bottom. Once you have found the exact frame from the video you would like, simply click the floppy disk in the right hand corner that reads “Save a Photo.”
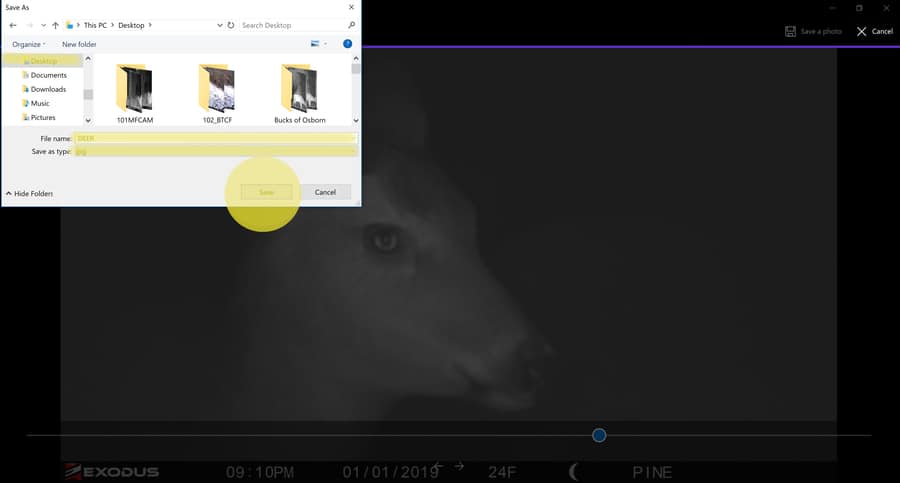
A dialogue box will appear on the screen. On the left hand side of the dialogue box you can select where you would like the photo to be saved to. You can name the photo under “File Name,” and make sure you select the file to be saved as a jpg. file under the drop down menu named “save as type.” Click “Save” and you photo will be saved.
Snipping Tool
Possibly the easiest way to extract a photo from a video is simply by using the snipping tool, that is provided on all Windows operating software.
Once you have found the frame in the video that you want to save as a photo, simply press windows menu key on the keyboard. Type in snipping tool. The windows application should appear on the top of your search query.
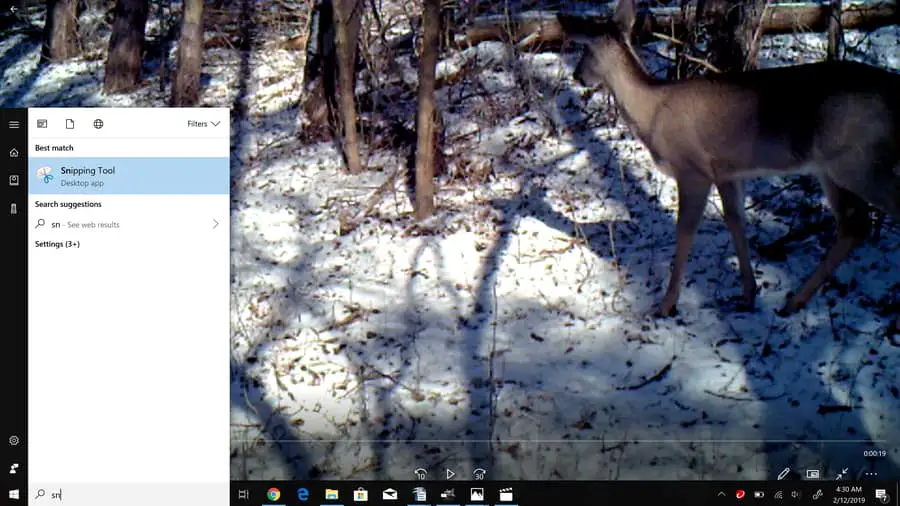
A small dialogue window should appear on your screen. Click on the button that says new. This will turn your cursor into a “+” sign.
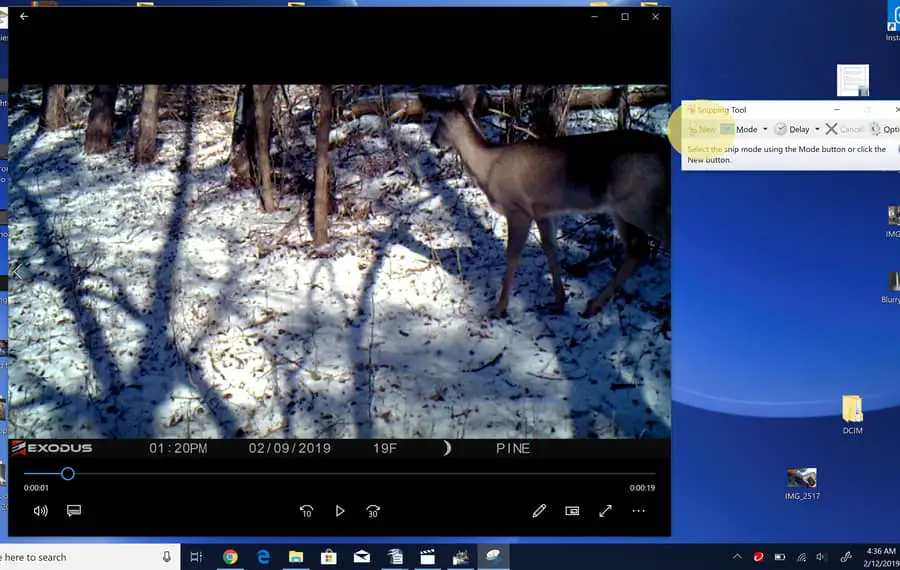
From the top left hand corner of the paused video, left click with your mouse, and drag a box around the frame of video you have chosen.
Once you let go of the mouse, all that is selected will appear in a dialogue box. This will be your picture. Click on the floppy disk symbol, to save this file as a picture.
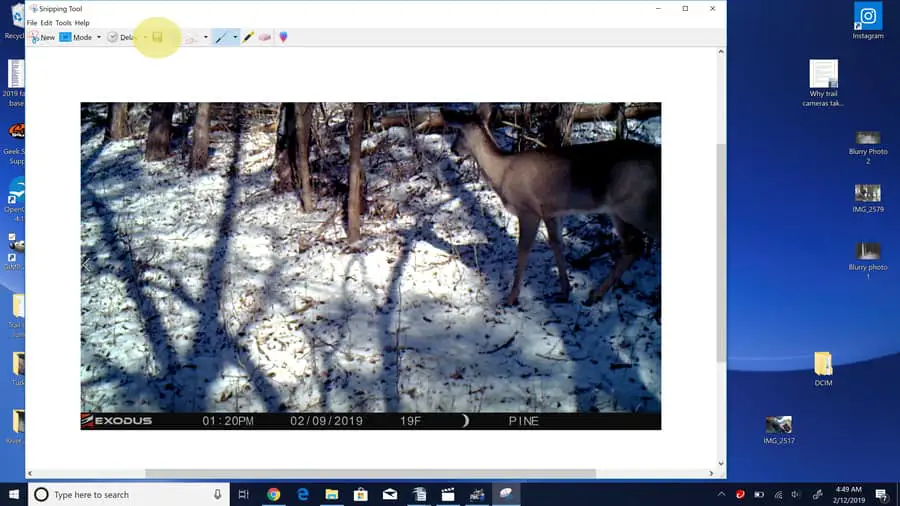
Once you press save, on the left hand side you will have the ability to choose where you would like to save the photo. At the bottom you can change the name of the photo, and beneath that you will want to click on the drop down menu that is labeled save as type and select JPEG file.
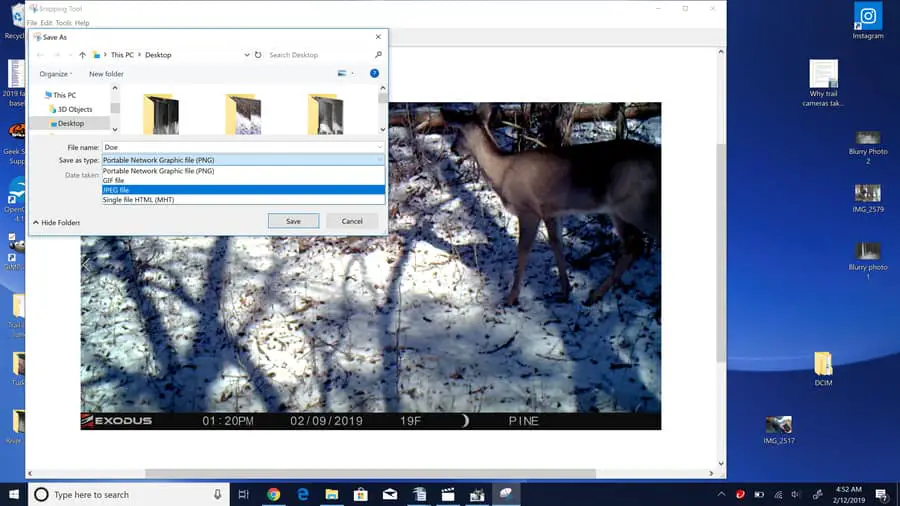
Your photo will automatically be saved in the location you selected.
Screen Shot Option
This option is a bit more advanced than using the snipping tool and the save as photo options, but with slightly older computers, this might be the only option you will have. Its not terribly difficult, but it will just take a few more minuets of your time.
Gimp/ Photo Shop
In this option we will be using GIMP photo editing software. It is a free software that you can download from the internet. In many ways it is very similar to Photo Shop, but because it is free, it does have some limits once you get into more advanced options. Luckly to extract a photo from a video, you will not need those options. The same priniciples would apply if you have access to photo shop as well.
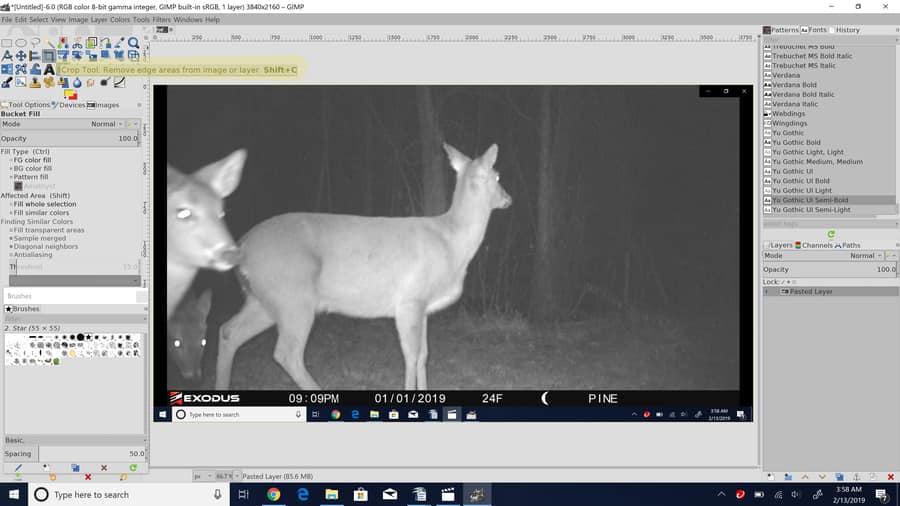
The first thing you must do, like all of the other options, find the frame in the video you would like to capture as your photo. Click on the center of the video to remove all lines from the video play, ensuring that you only have the photo in your screen.
Simply press the Print Screen (PrtScr) button on you keyboard. This will save your screen shot to the dashboard of your computer.
Now open up your GIMP software, and on the top of the menu bar select file and then create from clipboard. You can also perform this task by pressing Shift + Cntrl + “V” on your keyboard. This will automatically create the picture size to what is required from your screen shot.

At this point, your photo will appear in your GIMP work space. If you have any parts of the screen that you would like to get rid of around the edge of the photo simply select the crop tool and click and drag the box around the parts of the photo you would like to keep, and press enter on your keyboard.
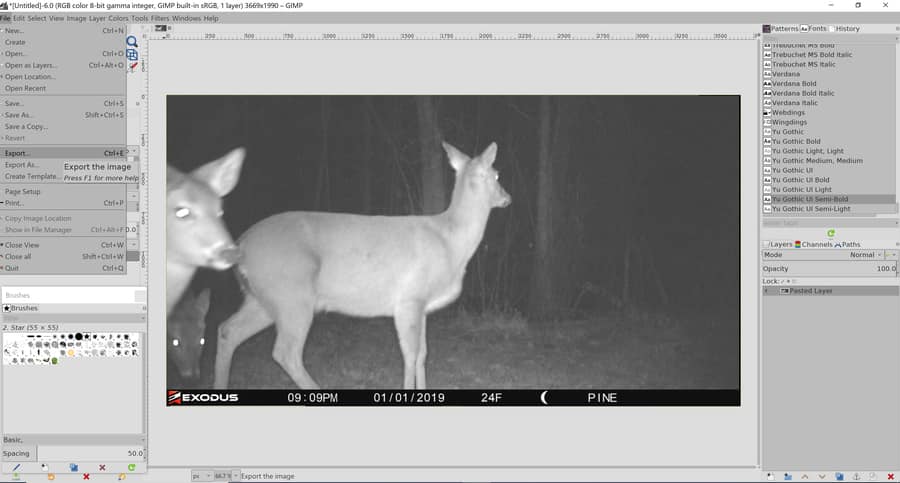
Once you have the photo that you want, it is important to save your photo. Now, be careful not to select save, as that will only save the photo within GIMP as a work piece, what you want to do is export this file onto your computer.
To export this photo, simply select file on the menu bar and select export. You can do this as well by pressing Ctrl + “E” on your keyboard.
This will bring up a dialogue box. On the left of the box you can choose where you would like to save your photo to. On the top, you will have a box where you can rename the file.
By default the program will set this file as a “.png.” This is a file used for transparent backgrounds and is not necessary. If you leave it as a .png, the file size will be much larger. Instead you will want to save the file as a “.jpg” For instance I would rename this photo deer.jpg.
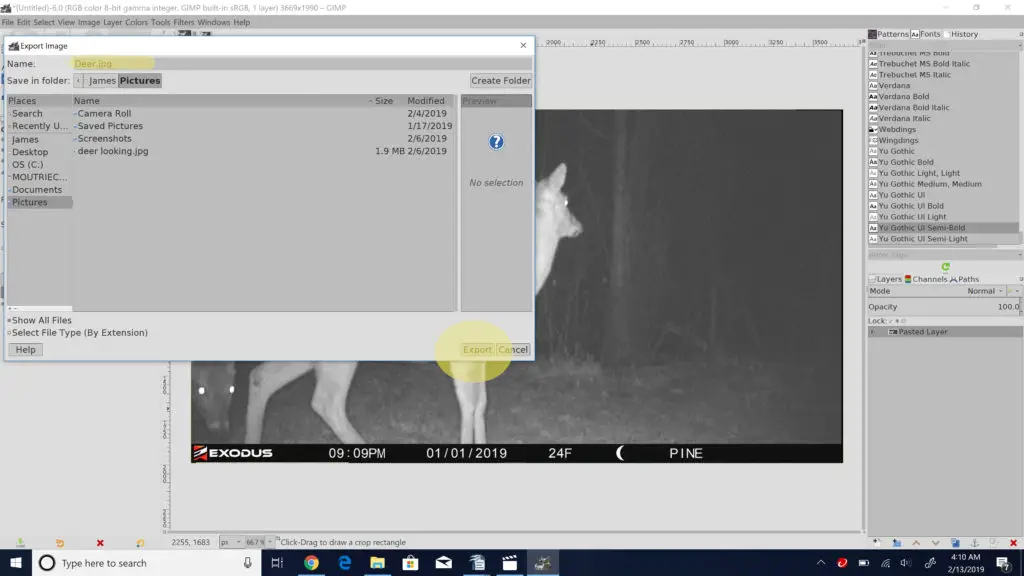
Finally, click export, and your photo will be saved to your computer in the file you have chosen.
Mac Computers
On Apple computers extracting a photo from a video seems to be a bit easier. There are two main ways you are able to perform this; using a screen shot, and using a grab tool.
Screen Shot
Using a screen shot with a mac will be very similar to that of a computer that uses Windows operating systems. So I will not go into great detail about how to work with GIMP, because the same principles will apply. however, to take a screen shot of the entire screen, you will need to simply use your keyboard and press shft + cmand +3.

Doing this will not only take a screen shot, but will place the screen shot in a document directly onto your desktop, making it simple and easy to click and drag into your open GIMP window.
Gimp operations are the same for Mac as they are for any Windows operating system. Follow the same steps on to extract the photo using GIMP tools that is laid out in the section above
Grab Tool
This tool, is similar to that of the snippet tool, in that you are able to select the exact portion of the screen you want to save.
Using your keyboard press Shft + Cmand + 4. This will bring up a selection box tool. Using your mouse click and drag the area you would like to save as your photo, release the mouse.

The area you selected will appear as a photo file on your desktop. It really is that simple.