
I spend hour every week, hiking into remote locations, hanging trail cameras, changing batteries, downloading SD cards, and organizing photos. There are few things more frustrating than finally sitting down at the end of a long day, only to realize that half of the photos are blurred from fog and condensation. Its a helpless feeling knowing your camera is deep inside a cedar swamp or 4 steep ridges over, and every morning until you can make it back, will be taking more blurry pictures as it collects water onto the lens.
Dealing with trail camera condensation can be tricky. It is the ultimate struggle between electronic devices and mother nature. The key is to deal with it before it occurs. There are numerous products on the market that you can apply to the lens that helps alleviate condensation build up.
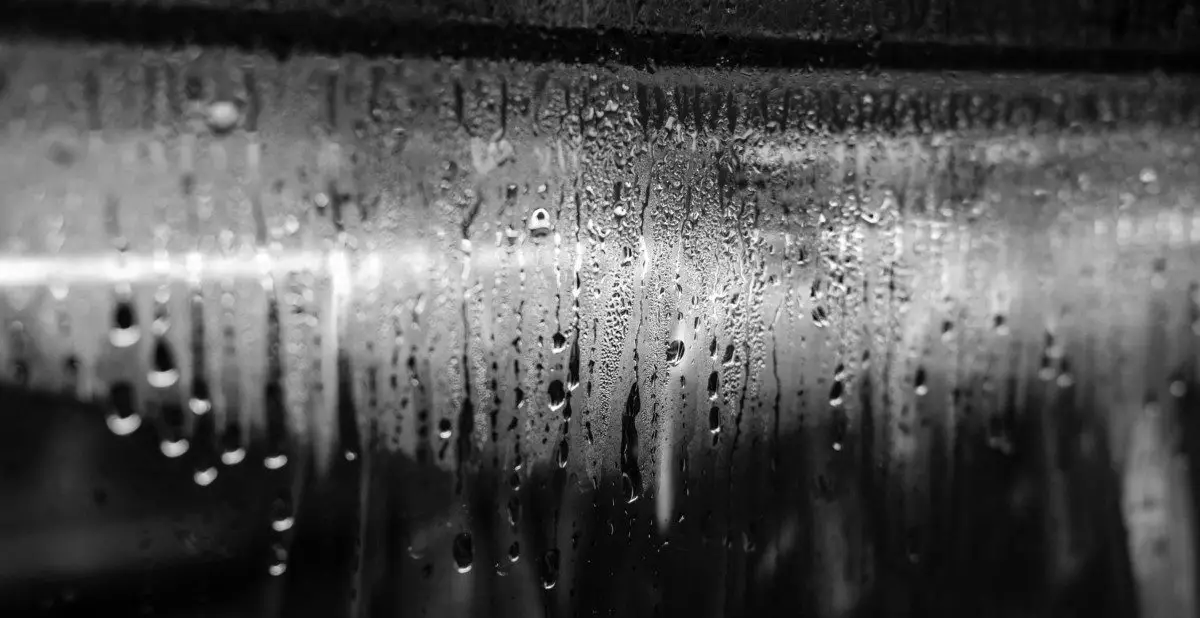
What Causes Condensation
Condensation is a fairly simple concept to understand. It basically occurs whenever the weather changes rapidly, and the temperature of your camera is cooler than the air. Think of what happens when you pour yourself a cold glass of sweet tea in the middle of the summer. The outside of the cup begins to sweat, or condensate. You get yelled at to use a coaster, and when you go to lift the cup up, the glass is noticeably colder than the surrounding air. The reaction between that cold glass and the warmer surrounding air is what causes condensation.
The same principle often occurs with trail cameras, typically in early mornings. Throughout the course of the night, temperatures tend to drop, cooling the surface temperature of your camera. The last few hours of morning darkness tend to be the coolest of the day. Once the sun begins to rise, the atmospheric temperature rises quickly, but the trail camera’s surface temperature is unable to warm at the same rate, causing condensation to form.
In photography this is a common occurrence. If you have ever watched a professional photographer work a wedding, going from an air conditioned building to taking photos outside, they deal with the same condensation build up on their lenses.
Dew Point
While quick temperature changes to solid surfaces has an immediate impact on condensation, the other factor that creates water build up is dew point. Likely you have heard your local meteorologist mention the dew point temperature, and if you are anything like me, you never gave it two seconds of thought about what it actually means.
The dew point temperature is the actual temperature in which the air would be saturated with water. For example if the dew point temperature is 60 degrees, and the actual temperature is at 70 degrees, you will be able to feel humidity in the air, but it is not physically wet. If the temperature falls to 60 degrees, the air would be saturated, creating a humidity of 100%. Any decrease in temperature, or even increase in water vapor from evaporation, the result would be condensation. This is often experienced during morning hours when you can physically experience the dew on surfaces such as grass or your vehicles windows.
The condensation that is created from dew point will have the same affect on the lens of your trail camera as the condensation that is formed with the difference in surface temperature and air temperature.
How to Handle Trail Camera Condensation
Unlike traditional photography where condensation build up can be addressed immediately, you often wont be aware of the problem until you check your photos days, weeks, or even months later. If you happen to come across a camera where condensation is still on the lens though, the best thing to remember is to not wipe it off. Wiping a camera lens with any moisture, can cause not only streaks and smudges, but small particles of dust mixed with lens can cause scratching. It is best to either wait until the condensation has evaporated, or bring the camera inside and stabilize the temperature.
Once the camera is dry, or to prevent any condensation before setting the camera out, wipe the dry lens with a microfiber cloth. While using your shirt, or any other cloth you have handy, is more convenient, using anything other than a microfiber cloth designed to clean camera lenses will actually leave your lens dirtier than when you started. Using the microfiber cloth, start with the middle and clean using concentric circles, working your way to the edges. This will force any dust particles, not being picked up by the cloth, to the outside of the lens.
Now that the lens is clean, you can apply an anti fogging product, by gently using a Q-tip to apply it. There are many products on the market, most notably brand names such as Rain X and Fog X are very popular. I personally have found great success with a brand called Cat Crap. It comes in a container similar to lip balm, is simple to apply, and is relatively inexpensive. I have found that it also does a solid job of keeping dust particles from sticking to the lens as well.
While no product is going to completely rid your trail camera of condensation build up, every little bit helps. These specifically manufactured anti fogging products are safe for camera lenses, but be sure to check your camera’s manual for proper cleaning instructions, to assure you are not voiding any warranty.
Condensation within the Camera Housing
Now that the lens is clean, it is important to keep an eye on the condensation build up inside the housing of the camera. It should go without saying, but water buildup, and electronics are not a good combination. Water, even the slightest amount can cause a malfunction with the SD card, batteries and internal components.
While all trail cameras are water resistant, and have a sealed housing, the same ingredients of air and colder surfaces, that create condensation, are contained within the trail camera. If your camera is exposed to water the first step is to make sure that you take the batteries out of the unit. Batteries when wet, cause corrosion, and is likely the first trigger to long term damage to the camera.
The easiest way to keep moisture out of a sealed container to begin with, is by taping small silica gel packets inside the housing. Silica gel is found in everything from beef jerky bags to electronic device packaging. It can contain up to 40% of its weight in moisture and bring down the humidity in a contained space by up to 40%. Silica gel packets are inexpensive if you buy them online, or you could simply buy a package of your favorite jerky, and reuse the silica packet that they provide. That’s a win win if I ever heard of one.